Dalek Supreme
Well-Known Member
1) Cannabis Cultivation Basics Using Passive Hydroponics (Hempy) & Maxibloom (Lucas Formula)
Introduction: This tutorial is geared to a specific method which is adaptable/transferable to other methods of growing. Geared for the beginner grower, or those interested in a simple Hempy guide beyond drilling a hole (see ch 8 ).
Having good genetics (seeds/clones from a reputable vendor), a clean proper enviroment, and keeping it simple will give you great Weed.
The basics, and simple methods using the one part nutrient GH Maxibloom ( http://lucasformula.com ), and the passive hydroponics of Hempy.
Check out http://growweedeasy.com for specific tutorials on plant training, sexing, plant problem troubleshooting, and other grow topics.
Get to know how to grow first before experimenting, and, or taking advice from amateurs (those that think they found the secrets). Use keywords like "grow", and "cannabis" in your internet searches to help narrow down results.
Quick Reference:
Veg: 18/6 Bloom: 12/12
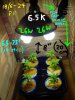
6500K Veg 2700K Bloom (ok to mix in some 6.5K)
Maxibloom: 1/2 tsp (3.5 grams dry measure) per gal (500 watts, or less lighting). 1 tsp (7 grams dry measure) per gal (600 watts, or more lighting, or Sun)
Dynagro ProTekt (Silicone): .5ml per gal (nute jug)
PH: 6.0 (piss yellow using GH PH kit)
Bleach: 1-2 drops from a pipette per gal (do not exceed 3 drops, Do both PH 6, and nute jugs)
PH 6 Jug: 1 gallon of ph 6 water only
Nute Jug: 1 gallon of nutrient ph 6 water
Store jugs, and supplies in a clean, cool, dark, and dry place
Checklist:
Rockwool 1.5" starter cubes
Some Pipettes (Do not mix pipettes, or use the same one for different liquids)
General Hydroponics (GH) ph kit (ph up, ph down, tester fluid, and vial)
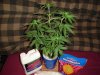
GH Maxibloom (2.2 lbs bag lasts a long time)
Dynagro ProTekt silicone (pint,or quart)
Hydroton clay balls (at least a 2 lb bag)
Several dark colored 40z hard plastic drinking cups
Two clean 1 gal jugs
Seeds from an Indica dominant strain from a reputable vendor
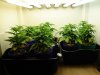
2) Photoperiods Vegetative & Bloom:
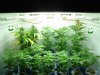
Veg 18/6: At least 18 hours of light keeps the plant in a growth stage. The plant can be kept like this indefinitely even in a small space using Bonsai, or LST (light stress training). The more you veg the more the mature the plant (1-2 or more months for maturity).
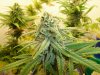
Bloom 12/12: 12 hours of light followed by 12 hours of uninterrupted dark makes the plant stretch (strain determines how much), and produce flowers (buds), or pollen sacks (balls) if male. Light leakage during the dark will stress out plant, and cause it to hermaphrodite (hermie), or grow male parts. Applying Bonsai techniques, or root trimming stresses plant in bloom, but some LST is ok.
Blooming from seedling can be done, but less yield compared to a mature plant.
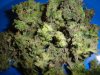
Indica typically takes 2 months to finish blooming, is bushy, and produces a body stone.
Sativa can take 3 months, or more, tall lanky, and a head cerebral high with some psychedelics.
Most strains are hybrids of the two. Avoid autoflowering strains, or feminised seeds which are counterintuitive to this tutorial.
Light Spectrum/Color Temperature:
Veg: 6500 K (Kelvin) bright summer daylight blue hue. Fluorescent tubes, CFL bulbs, or Metal Halide (MH) lighting.
Bloom: 2700 K fall harvest orange red sun. Fluorescent tubes, CFL bulbs, or High Pressure Sodium (HPS) lighting.
For veg stick with 6500k only, but in bloom mixing in some 6500k is beneficial.
Colored cfl bulbs (red/blue/orange) used for mood/party atmosphere do not work. LED lights with these colors are a different thing, and do extensive multisourced research before buying LED grow lights. Halogen, and incandescent bulbs do nothing for plants except give off heat. Plants cannot see green light which people use (green flashlights) to inspect during the bloom dark period (I would only do this if absolutely needed).
There are reflective coverings people use to line the walls of their grow such as Mylar. I prefer to use flat white paint with low voc (volatile organic compounds) which is premium house paint. If using MH, or HPS buy a quality metal reflector for it instead of having mylar, or paint falling on the hot bulb.
Less wattage is needed in veg. More wattage is needed in bloom to dense out the buds. Floros are great for veg, does the job for bloom, but HPS will have an edge over floros in bloom.
Get to know your specific lighting's penetration, sweetspot, and distance recommendations.
3) Target Temperatures & Humidity Level (the ideal enviroment which to dial your system into the best you can):
Plant: 70°-75°F
Root zone: 65°-72°F (higher temps can lead to root rot while lower temps can stress with freezing being fatal).
Germinating Seed:
75°-80°F It's most important that the emerging Taproot does not dry out, and not saturated, but moist (remember that the root takes up oxygen).
Humidity level no more than 50%. It's less important during veg, but crucial during bloom. 40%, or less during bloom along with airflow will fight off mold. 50% during vegetative will help plant take moisture through it's leaves rather than through the roots.
Airflow: Air exchange/flow is good to move around oxygen & carbon dioxide molecules the plant uses (through leaves & roots). Moving air fights off mold. Ideal flow is cooler air flowing around containers, then moving up through canopy. By using silicone it negates the need to strengthen the stem by having a fan blowing the plant around (people over do this). The above as a guide & blowing on plants yourself when you tend them is enough.
Silicone gives the plant more resistance against environmental stresses, insect resistance, and gives an overall strengthened plant.
Foliar feeding (misting feed under leaves) is silly. It's a technique for prize Roses that have a compromised root system due to over hybridization. People over do things for a weed.
4) PH 6 & Nute Jugs:
Take two 1 gallon jugs and fill up with tap water. One jug will be your zero strength solution even though tap water, or well water will have a certain parts per million (ppm) of minerals the plant feeds on. The other jug will be your 100% nute strength solution.
PH 6 jug: Just adjust water to ph 6.0 (piss yellow) as per directions. Remember that slightly orange, or green is not piss yellow.
Nute jug: Add .5ml of Dynagro Protekt (shake bottle beforehand) silicone, and shake jug (white flakes in the Protekt is normal). Then add 1/2 tsp Maxibloom (500 watts or less). You may want to slowly spoon it in rather than heaping it in. This will help it dissolve, and help prevent spillage. Shake vigorously, let sit a minute, and then adjust ph to 6.
Check jugs an hour later just to make sure that they remained stabilized at ph 6 (they should not change). In time if your water source is consistent, then you will know how much ph up, or ph down is needed without taking ph readings. It's good to check incase your water source fluctuates in ph.
Bleach: Each jug after ph adjusting receives 1-2 drops of regular chlorine (nonscented) bleach. Do not exceed 3 drops from a pipette (drops from the bleach cap will kill your plants). If your tap has a strong chlorine smell to begin with then use just 1 drop, or none if really strong. Some people (I never needed to) store jugs overnight with the cap off before preparation. This gases off the tap water chlorine.
5) Using PH 6 & Nute Jugs:
The PH 6 jug is used by it's self when zero strength water is needed. To ph balance rockwool, Keeping seed moist, or propagating clones, flushing out, or resetting the reservoir.
The nute jug is your 100% feed that you vary to lesser strengths in percentages using the PH 6 jug.
Feeding solution example using 50% strength:
Take your feeding container (cup, or other), fill up halfway with nute, fill remaining half with PH 6, and stir. This is 50% feed.
The one constant mistake I would do is over strength feed. This will nute burn the plant causing outer edges of the leaves to crisp off. This is more critical in bloom.
The closest to 100%, or 100% depends on factors such as plant maturity, lighting intensity, feeding the 12/12 stretch, and your particular strain's needs.
Making sure you are ph'ed to 6, keeping a proper environment, and knowing under strength nute is better than overstrength will ensure your success.
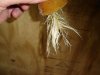
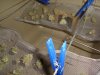
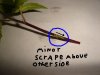
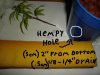
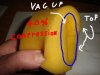
6) Rockwool Starter Cube (1.5") Germination:
When Rockwool is dry treat them like fiberglass insulation. Do not ever squeeze RW. They are naturally alkaline (high ph) so they must be ph balanced.
Fill a bowl with PH 6 solution (you can presoak seeds separately at this time), put in the RW cubes, and let soak a few minutes. Take cubes out, and for each one flick it (snap of the wrist) to release water (do over a sink & do not squeeze). Return to bowl to repeat. Keep note how it looks soaked compared to flicked out (you want some air pockets when inserting seed).
Repeat with a fresh bowl of PH 6 solution. One more fresh bowl but catch flicked water, and test ph. When it comes out ph 6 it's ready.
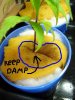
The cube will have a slit, or hole on one side. Make sure cube is moist not saturated (touching back of hand to it will leave light perspiration), and place seed on it's side below surface no deeper than seed width. Rip off a corner of cube, and cover up seed gently.
Place in Tupperware tub, lightly mist sides (no pooling of water), cover with plastic wrap with some poked holes. Put in dark 75°-80°F place. Wait for sprouting checking once in awhile to let in fresh air, and monitor moisture.
Introduction: This tutorial is geared to a specific method which is adaptable/transferable to other methods of growing. Geared for the beginner grower, or those interested in a simple Hempy guide beyond drilling a hole (see ch 8 ).
Having good genetics (seeds/clones from a reputable vendor), a clean proper enviroment, and keeping it simple will give you great Weed.
The basics, and simple methods using the one part nutrient GH Maxibloom ( http://lucasformula.com ), and the passive hydroponics of Hempy.
Check out http://growweedeasy.com for specific tutorials on plant training, sexing, plant problem troubleshooting, and other grow topics.
Get to know how to grow first before experimenting, and, or taking advice from amateurs (those that think they found the secrets). Use keywords like "grow", and "cannabis" in your internet searches to help narrow down results.
Quick Reference:
Veg: 18/6 Bloom: 12/12
6500K Veg 2700K Bloom (ok to mix in some 6.5K)
Maxibloom: 1/2 tsp (3.5 grams dry measure) per gal (500 watts, or less lighting). 1 tsp (7 grams dry measure) per gal (600 watts, or more lighting, or Sun)
Dynagro ProTekt (Silicone): .5ml per gal (nute jug)
PH: 6.0 (piss yellow using GH PH kit)
Bleach: 1-2 drops from a pipette per gal (do not exceed 3 drops, Do both PH 6, and nute jugs)
PH 6 Jug: 1 gallon of ph 6 water only
Nute Jug: 1 gallon of nutrient ph 6 water
Store jugs, and supplies in a clean, cool, dark, and dry place
Checklist:
Rockwool 1.5" starter cubes
Some Pipettes (Do not mix pipettes, or use the same one for different liquids)
General Hydroponics (GH) ph kit (ph up, ph down, tester fluid, and vial)
GH Maxibloom (2.2 lbs bag lasts a long time)
Dynagro ProTekt silicone (pint,or quart)
Hydroton clay balls (at least a 2 lb bag)
Several dark colored 40z hard plastic drinking cups
Two clean 1 gal jugs
Seeds from an Indica dominant strain from a reputable vendor
2) Photoperiods Vegetative & Bloom:
Veg 18/6: At least 18 hours of light keeps the plant in a growth stage. The plant can be kept like this indefinitely even in a small space using Bonsai, or LST (light stress training). The more you veg the more the mature the plant (1-2 or more months for maturity).
Bloom 12/12: 12 hours of light followed by 12 hours of uninterrupted dark makes the plant stretch (strain determines how much), and produce flowers (buds), or pollen sacks (balls) if male. Light leakage during the dark will stress out plant, and cause it to hermaphrodite (hermie), or grow male parts. Applying Bonsai techniques, or root trimming stresses plant in bloom, but some LST is ok.
Blooming from seedling can be done, but less yield compared to a mature plant.
Indica typically takes 2 months to finish blooming, is bushy, and produces a body stone.
Sativa can take 3 months, or more, tall lanky, and a head cerebral high with some psychedelics.
Most strains are hybrids of the two. Avoid autoflowering strains, or feminised seeds which are counterintuitive to this tutorial.
Light Spectrum/Color Temperature:
Veg: 6500 K (Kelvin) bright summer daylight blue hue. Fluorescent tubes, CFL bulbs, or Metal Halide (MH) lighting.
Bloom: 2700 K fall harvest orange red sun. Fluorescent tubes, CFL bulbs, or High Pressure Sodium (HPS) lighting.
For veg stick with 6500k only, but in bloom mixing in some 6500k is beneficial.
Colored cfl bulbs (red/blue/orange) used for mood/party atmosphere do not work. LED lights with these colors are a different thing, and do extensive multisourced research before buying LED grow lights. Halogen, and incandescent bulbs do nothing for plants except give off heat. Plants cannot see green light which people use (green flashlights) to inspect during the bloom dark period (I would only do this if absolutely needed).
There are reflective coverings people use to line the walls of their grow such as Mylar. I prefer to use flat white paint with low voc (volatile organic compounds) which is premium house paint. If using MH, or HPS buy a quality metal reflector for it instead of having mylar, or paint falling on the hot bulb.
Less wattage is needed in veg. More wattage is needed in bloom to dense out the buds. Floros are great for veg, does the job for bloom, but HPS will have an edge over floros in bloom.
Get to know your specific lighting's penetration, sweetspot, and distance recommendations.
3) Target Temperatures & Humidity Level (the ideal enviroment which to dial your system into the best you can):
Plant: 70°-75°F
Root zone: 65°-72°F (higher temps can lead to root rot while lower temps can stress with freezing being fatal).
Germinating Seed:
75°-80°F It's most important that the emerging Taproot does not dry out, and not saturated, but moist (remember that the root takes up oxygen).
Humidity level no more than 50%. It's less important during veg, but crucial during bloom. 40%, or less during bloom along with airflow will fight off mold. 50% during vegetative will help plant take moisture through it's leaves rather than through the roots.
Airflow: Air exchange/flow is good to move around oxygen & carbon dioxide molecules the plant uses (through leaves & roots). Moving air fights off mold. Ideal flow is cooler air flowing around containers, then moving up through canopy. By using silicone it negates the need to strengthen the stem by having a fan blowing the plant around (people over do this). The above as a guide & blowing on plants yourself when you tend them is enough.
Silicone gives the plant more resistance against environmental stresses, insect resistance, and gives an overall strengthened plant.
Foliar feeding (misting feed under leaves) is silly. It's a technique for prize Roses that have a compromised root system due to over hybridization. People over do things for a weed.
4) PH 6 & Nute Jugs:
Take two 1 gallon jugs and fill up with tap water. One jug will be your zero strength solution even though tap water, or well water will have a certain parts per million (ppm) of minerals the plant feeds on. The other jug will be your 100% nute strength solution.
PH 6 jug: Just adjust water to ph 6.0 (piss yellow) as per directions. Remember that slightly orange, or green is not piss yellow.
Nute jug: Add .5ml of Dynagro Protekt (shake bottle beforehand) silicone, and shake jug (white flakes in the Protekt is normal). Then add 1/2 tsp Maxibloom (500 watts or less). You may want to slowly spoon it in rather than heaping it in. This will help it dissolve, and help prevent spillage. Shake vigorously, let sit a minute, and then adjust ph to 6.
Check jugs an hour later just to make sure that they remained stabilized at ph 6 (they should not change). In time if your water source is consistent, then you will know how much ph up, or ph down is needed without taking ph readings. It's good to check incase your water source fluctuates in ph.
Bleach: Each jug after ph adjusting receives 1-2 drops of regular chlorine (nonscented) bleach. Do not exceed 3 drops from a pipette (drops from the bleach cap will kill your plants). If your tap has a strong chlorine smell to begin with then use just 1 drop, or none if really strong. Some people (I never needed to) store jugs overnight with the cap off before preparation. This gases off the tap water chlorine.
5) Using PH 6 & Nute Jugs:
The PH 6 jug is used by it's self when zero strength water is needed. To ph balance rockwool, Keeping seed moist, or propagating clones, flushing out, or resetting the reservoir.
The nute jug is your 100% feed that you vary to lesser strengths in percentages using the PH 6 jug.
Feeding solution example using 50% strength:
Take your feeding container (cup, or other), fill up halfway with nute, fill remaining half with PH 6, and stir. This is 50% feed.
The one constant mistake I would do is over strength feed. This will nute burn the plant causing outer edges of the leaves to crisp off. This is more critical in bloom.
The closest to 100%, or 100% depends on factors such as plant maturity, lighting intensity, feeding the 12/12 stretch, and your particular strain's needs.
Making sure you are ph'ed to 6, keeping a proper environment, and knowing under strength nute is better than overstrength will ensure your success.
6) Rockwool Starter Cube (1.5") Germination:
When Rockwool is dry treat them like fiberglass insulation. Do not ever squeeze RW. They are naturally alkaline (high ph) so they must be ph balanced.
Fill a bowl with PH 6 solution (you can presoak seeds separately at this time), put in the RW cubes, and let soak a few minutes. Take cubes out, and for each one flick it (snap of the wrist) to release water (do over a sink & do not squeeze). Return to bowl to repeat. Keep note how it looks soaked compared to flicked out (you want some air pockets when inserting seed).
Repeat with a fresh bowl of PH 6 solution. One more fresh bowl but catch flicked water, and test ph. When it comes out ph 6 it's ready.
The cube will have a slit, or hole on one side. Make sure cube is moist not saturated (touching back of hand to it will leave light perspiration), and place seed on it's side below surface no deeper than seed width. Rip off a corner of cube, and cover up seed gently.
Place in Tupperware tub, lightly mist sides (no pooling of water), cover with plastic wrap with some poked holes. Put in dark 75°-80°F place. Wait for sprouting checking once in awhile to let in fresh air, and monitor moisture.
Last edited: