RhymesWithGosh
Well-Known Member
oh and i got nfl blitz, that one is alright.


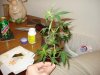
whats them strains you got in there
nice set up looks good
sorry too hear about your gf life is a bitch sometimes, i took my first 8 cuttings ever yesterday, 7 off a white widow that i kept behind too mother and 1 off a nemesis that got severe nute burn. i,m gonna use the 7 ww to start my sog (thats if they root)so we can compare results . wish me luck and good luck too you too i hope all goes well with your clones.
young animals are prone too disease so dont feel too bad about it. hope your girl friend recovers. my clones got damp on the side of the peat pots i am using because of the moisture in the propagator i am really pissed off about this and was wondering how you did your clones, did you use a propagator?
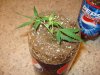
No sir, i did not use a propagator. I simply prepared my pots (soil and watered it prior to taking cuttings). I took cuttings that had a stem that was at bare minumum 5 inches long, 45 degree angle when cut. Cleaned the stem of fan leaves/new shoots and left 2 fan leaves on top. Dip in water, dip in rooting compound and stick it in the soil as far as i can. Then boom in 10-14 days your clones should be new plants.
Like i said i got my technique from the april 2009 of high times. there is no need for a humidity dome because of the length of the stem. The plant pulls moisture from the stem. I'm taking clones on monday, so ill post pics of when i do.
hey, so the mould was down to a wet rag which had gone mouldy in the veg room. you see my veg room is round the corner in my friends house so he controls that side. but hey i feel like i,m jacking your thread so mine is in my sig if you wanna pop in. not had many visits. oh and did i rep you for the grow room if not let me know
this was really nice.
I like how its so simple and yet really
sufficient?
So you're harvesting every 2 weeks right?
Sorry about your GF and kitten.
Just look forward to good things.
I could switch strains. I have top 44 and that could cut 2 weeks off of flowering time.