Stealth Cabinets

stelthy

Well-Known Member
I was gonna aske also mate how many times a week do you think these buckets will need topping up? I would imagine different strains would use different amounts of nutes but have you an approx ball park figure. I think when the ladies are in the pots i will be able to get apporx 18 ltrs of liquid in there maybe 20 at a push.

When it comes to water changes in Veg...you'll not have to change the nuits for weeks at a time :) but in Flower this time will be reduced until almost every couple of days or so depending on how tall you decide to let your ladies grow?!! - stelthy :leaf:
 

BudBaby

Active Member
When it comes to water changes in Veg...you'll not have to change the nuits for weeks at a time :) but in Flower this time will be reduced until almost every couple of days or so depending on how tall you decide to let your ladies grow?!! - stelthy :leaf:
I was thinking about a metre tall, from what I have read the taller the plant the less led can penetrate so I reckon a metre will be about bang on.

As soon as I have the top cabs bolted on ill hang the lights, I'm hoping this will be easy.

So basicly as the flower grows the more you have to keep topping up the buckets.
 

stelthy

Well-Known Member
I was thinking about a metre tall, from what I have read the taller the plant the less led can penetrate so I reckon a metre will be about bang on.

As soon as I have the top cabs bolted on ill hang the lights, I'm hoping this will be easy.

So basicly as the flower grows the more you have to keep topping up the buckets.
Yeah 1M is a good size.. and 'top' each plant twice and you'll have lots of bud :) I look forward to seeing the lights all hung up :) and lastly "spot on" the more she grows the more she drinks and the more water/nuit changes are needed :) - STELTHY :leaf:
 

BudBaby

Active Member
Ok mate cheers. Im hoping to have a full day on it tomorrow. If you get time can you post the diagram for the airlines please.

Ive just got some unibond super bathroom sealent which is mould resistant and water proof.

ive been thinking about the hooks that the bungees are hung to, they arent plastic coated, do you think they will be ok? I hope so because there in now and there quite big so im hoping i can still use them.
 

stelthy

Well-Known Member
Ok mate cheers. Im hoping to have a full day on it tomorrow. If you get time can you post the diagram for the airlines please.

Ive just got some unibond super bathroom sealent which is mould resistant and water proof.

ive been thinking about the hooks that the bungees are hung to, they arent plastic coated, do you think they will be ok? I hope so because there in now and there quite big so im hoping i can still use them.


Finally I've finished the pic and uploaded it lol :) It'll be great spending a day on it I hope to see lots of impressive pics :) The sealant sound's good! I am sure the hooks will be fine, However if they do vibrate its a very easy cheap task to change them for plastic/rubber coated ones :).

*NOTE: The drill holes are just an idea (top left)... this is what to do but place the holes so that they cover the entire carbon filter.. this will make a divider possible and also ensure an adequate air flow/release - STELTHY :leaf:
 

stelthy

Well-Known Member
After the air-lines are in place and functioning we can sort out some trunking to hide/protect them, and keep the room in check.. (Its important to protect the airline from light to avoid algae n other things) Trunking is great for this and is pretty easy to cover in silver tape, to color-code with your Mylar etc... - STELTHY :leaf:
 

BudBaby

Active Member
Thanks mate that's great. Will I still just need one airstone in each bucket. Also there is only one hole in each bucket for airline.
 

BudBaby

Active Member
Also mate do you think its best to drill one big hole in the appropriate places or a small hole for each airline? I take it I will use sealent round the holes for the airline?
 

stelthy

Well-Known Member
Thanks mate that's great. Will I still just need one airstone in each bucket. Also there is only one hole in each bucket for airline.
I'd put 2 air-stones in each pot 1 for pump (A) and 1 for pump (B) its pretty easy to make another hole for a 2nd air-line, This will give you lots of air bubbles..That's great !!! and the other added bonus of the air-stones is that the diffused bubbles will create less aqua noises :) - STELTHY :leaf:
 

stelthy

Well-Known Member
Also mate do you think its best to drill one big hole in the appropriate places or a small hole for each airline? I take it I will use sealent round the holes for the airline?
I'd say a small hole for each airline is better and then sealant the lines holes :) - STELTHY :leaf:
 

BudBaby

Active Member
Excellent thanks mate. Did you say i needed to staple a towel over the holes? Should i use a big towel and double it up or just a single layer?
 

BudBaby

Active Member
Ive just ordered some more air stones and airline mate. It says on the website to make sure the airline is kink free, wont the way we are doing this create kinks?
 

stelthy

Well-Known Member
Excellent thanks mate. Did you say i needed to staple a towel over the holes? Should i use a big towel and double it up or just a single layer?
You could lay a towel over the holes (half the towel) and staple it down every 6cm apart etc :) then fold the spare half back over the 1st bit, and staple that in place in the same way - STELTHY :leaf:
 

stelthy

Well-Known Member
Ive just ordered some more air stones and airline mate. It says on the website to make sure the airline is kink free, wont the way we are doing this create kinks?
Glad you've ordered them.. No the airlines won't have kinks - Its ok to curve them, and if need be use elbows and joins to create angles etc, Also the air-lines will not be pulled tight, and have a bit of slack...trust me this will be fine :) - STELTHY :leaf:
 

BudBaby

Active Member
Had about 3 hours solid on it today. I drilled loads of 6mm holes in the top of the right top cab and stapled a towel over them. I forgot to take a pic of it without the towel on so excuse that missing picture lol.

I found that drilling holes messed up the fat mate inside so we had to fiddle about unblocking all the holes for ages so the other cab i just cut out a rectangle with the jigsaw:lol:.

Managed to move the cabs to create the required 4" gap at the near side and i tell you what mate they weigh a ton, im a 20 stone ex bodybuilder so im used to shifting weight but this is something else. We just about managed to do it, totally knackered now but i think i can do the rest without having to move the top cabs again, may be slightly tricky but i dont mind. Im not gonna actually bolt the top cabs on until i know 100% everything is fine just incase we did have to move them again but i can get to the first bend i fitted today and rekon i can do the airlines without moving them.

Got a good few hours on it tomorrow so im hoping to get the second bend fitted, the first one secured with screws, the bottom holes cut and bends fitted then next week i can concentrate on the airlines and take my time. Then its just weather stripping and lights to hang and any final touch ups that need doing including a coat of wood stain.

I dont think im gonna bother with locks, i cant think of anyone who is just gonna randomly wonder into my spare room and try and look in the cabs. If they get that close to the cabs anyway they will be suspect because of the slight noise. In an emergancy ie someone has to go in that room to do a repair(very highly unlikely as its just an empty room, theres no boilers or anything in there) i should be able to switch the pumps off for an hour but i cant see why anything would need doing in there. As we rent though they can come and inspect the house but they wouldnt be able to go through my property so i think im covered.

If i can get the lot done next week ill be very happy and very relieved lol. Its been a right pain as my sister is a single mom so can only get up for a couple of hours 2-3 times a week max and she has been vital for linig the smaller cabs as i couldnt get inside them. Nearly there now though.

On another note i had a right bonus yesterday, i forgot to order my hygrometers so i asked for them to be delivered with my stuff on back order, they said i could have them for keeping me waiting lol:)
 

Attachments

BudBaby

Active Member
Ive been working out the plan for the airlines also, the 8 way valve thing i have got has 4 outlets on the right side and 4 outlets on the left side. For the left cab ill run the lines to the left side of the cab then down the side of the main cabs into the bottom, then ill be able to run 4 off the right side of the valve down the right side of the main cab and into the bottom of the other cab via holes and vice cersa for the other cab.
 

BudBaby

Active Member
I've got the 2 holes done for the bottom cabs. It's took ages because i cut them small with a hacksaw then filed them to a tight fit, probably took 2 hours to file them lol but the upside is they are well tight in there and there was no need for tape or anything. I'll get them all sealed tomorrow and post pics. I've pushed them through so the lip is just sticking out the outer side. You cant see the near side one at all even with the 4" gap:)

I've got the other bend in place also, i cant get to the holes i drilled for the screws but believe me this sealent is mega strong and there not going anywhere. I think im gonna seal around the inside of the bend so i can be 100% sure there air tight.

I'll get those bits done tomorrow and some update pics so you can see where we are. I'll either start on the airlines tomorrow or monday but i dont think they will take to long. If it works out how ive planned it ill have the lines running down both sides of each cab then i will have an airline and airstone going into each side of the bucket all nice and neat. Im not going to run them into the lower cab as the brim of the bucket is virtually flush with the bottom of the main cabs so ill just run them down to there and across into each bucket. Ill leave plenty of slack so i can cut it to size when i do my test run.

Then next week ill just have to attatch the flange to roof of the main cabs, measure our where im gonna fit my lights and make some small holes there, mylar the roof of the main cabs then attatch the bungee cords for the lights via small holes. Im gonna find some small caribiners to attatch to the lights and tie the cord on to each of these.

When thats done its just weather stripping and taping the corners of the cabs for neatness plus we got a bit of the spray adhesive on the side wall in one of the cabs but its no major hassle, ill remove it when i do the final cleaning of the cabs. Then hopefully towards the end of next week i can do a test run and tweak anything that needs doing:)

Then hopefully we can get cracking, im just glad all the stuff i couldnt do or couldnt do on my own is now complete. I can have lots of time on it now to get it right.
 

BudBaby

Active Member
Another productive day, im really pleased to say the least. It,s such a relief to be able to do the rest myself as i'll have it done in no time:)

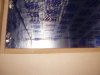
I think we underestimated how much airline we would need lol, i bought 60ft to start with and thats done the first 3 lol, i have another 60ft on order but ill need another 200ft on top of that lol. Ive ordered it anyway. As i say first 3 buckets are done, ive left plenty of slack in them for final adjustments and its easy and quick to do:):):)

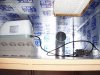
Ive checked each line and there is plenty of air coming through but i do have them on full power as realised you can adjust them at the 8 way manifold:)

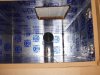
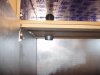
Internal 90 degree bends are fitted and sealed, i cant get at the nearside one to seal it from the outside but ive put plenty on the inside and they arent going anywhere and they will be airtight, i have fitted the flanges too.

Im still looking good at finishing this week but i do need to get a few final bits. Cha Ching ill get at a later date but i still need to get superthrive, how much do you think ill need of this as its pricey. 450ml bottle is over 30 notes, let me know and ill order it. I need to get a ph tester and ec tester too, those ones on ebay look ok but these look better although expensive they have a 5 year guarantee:). It does PH and EC. I take it with these i would only need 1 for all the plants?

I also need to order that hammerhead pk stuff, ive read they have stopped making it for some reason but there is still some being sold, i was thinking 3ltrs?

The last thing is i cant seem to get the lids off 5ltr Canna nuites lol, there is a diagram on the side but it seems to say you need some sort of spanner?

Anyway here is a few update pics:)
 

Attachments

BudBaby

Active Member
My main lights have just arived, man there super bright. I looked at them for a split second and my eyes are aching like fook now:) Ill def need some decent sunglasses for these. He has made it so one light plugs into the other so i just have to use one plug for the extension lead:)

I have a very very good feeling about these lights, he rekons i should be able to hit 2g per watt when i have my growing techinique sorted, if i can get 1.5g per watt on my first grow id be more than impressed.

Ive been rethinking what strain to grow, i wanted to grow 2 but then i realised if i have 2 strains finishing at 2 different times im not gonna have anywhere to dry it so i think im gonna just do 1 strain, i have been doing some reading up and think im gonna go for barneys farm vanilla kush. Its a 600g per sq mtr yeild and more importantly the smoke is meant to be awsome!!

Some more airline just arrived so il get those fitted later this afternoon. Im gonna try taping a soundproof tile ontop of the pump as its pretty silent upstairs but you can here it on downstairs lol, im thinking because i havent got the sides and top soudpoofed its vibrating from there and making the cabs slightly vibrate. I may aswell try and cover the fan with these tiles aswell and use them up. I can cut them to size and do a nice neat job.

Ive ordered those ceiling plates and hooks as i figure they will be perfect for me.
 
Top