Stealth Cabinets

stelthy

Well-Known Member


Ps.. No big deal but snip the excess string off the corners of the LED Panals, it will tidy the overall look and whats not needed is always good to remove. The cabs will look very pro and after spending so much time and money your efforts will be more than visualy pleasing, but productivly supplying you with nice buds indefinatly or for as long as you choose :) - STELTHY :leaf:
 

BudBaby

Active Member
Yes mate i was gonna do them anyway, i had a feeling i hadnt done the wiring properly yesterday, i think i just rushed it without proper thought. Your way sound alot better.

I will say though that the extension leads only have a 2 mtr cord so i dont think that will reach from the top cabs to the plug sockets. I have another 2 extendable extension leads but im not sure how good they would be for this purpose. The holes ive got now for the extension lead crds ill just fill with sealant so its no big deal.

Veg cab should be easy enough as it only contains 2 plugs, flower cabs will be a bit more tricky but i get the idea mate and it sounds good. I look forward to the pic.

Oh ive got all nuites by the way, barring cha ching and pk. I still need to get a missting bottle but thats no problem.
 

BudBaby

Active Member
Ive been thinking mate, would it be ok to plus the 10 gang extension lead into the extendable one and run that to the socket? Just saves me having to fork out for more extension leads, im thinking if i do it this way although the extendable lead isnt anti surge it will still be plugged into my main anti surge one, not sure if this would work?

Oh and the cord will have to come down the side of the cab as i cant get to the back of the top cabs, less stealth i know but its the only way i can do it.
 

BudBaby

Active Member
What are we gonna do about the light power cord mate as obviously with the light going up and down ill need most or it still in the cab.

Also for stealth purposes could we have the lead for the extension running down the inside of the main cabs? I could use the holes I have already predriilled then. Was thinking I could get some small truncking for it?
 

pazuzu420

Well-Known Member
Wow...every impressive job. The very high end of stealth very nice job by the both of you. I was sitting here thinking as I was reading over the last few entries and came up with a rather simple way for you to hide your power cord.
You could cut a hole in the back of the cabiunet and the wall and rewire the socket to inside the cabinet. Then just put a solid cover plate over the existing outlet, no one would ever know you had power going inside it.
This is a very simple procedure when you want to move a plug a very short distance. From the views you probally wouldn't have to worry about hitting a stud in the wall. Use what they call a 'remodel' box to reset your new outlet.

Anyhooo.....
 

BudBaby

Active Member
Thanks for the input man, i think im gonna run them into the top cab though, i wish i had taken my time yesterday as it makes sense.
 

stelthy

Well-Known Member


OMG Finally my shit PC has finally.. let me upload the pic. So...Here it is :) It'll be easy to hide your ext/ leads and power cables etc in this way, and then hide the 2 main plugs out n down the back + tack them in place :) All the equipments power cables will be fed/hidden in the top cabs, and out of harms way :).

All thats needed is a few holes drilled (cable thickness), some plugs taken off and re-attached, and/or a few extra lenghts of cable to extend any wires/cables nesessary, By feeding the 2 Ext leads out and down the back of one of the cabs will keep the STEALTH Element...

I hope the diagram gives you a better idea :)

I'll get around to replying to all your other messages this evening when the kids are in bed, Sorry for the late post, - STELTHY :leaf:
 

BudBaby

Active Member
Ok cheers for that mate i get the idea. Let me know about these extension cables, im not sure if an anti surge extension lead plugged into a standard extension lead will still give me protection, i cant see why not as all my stuff will still be plugged into the anti-surge extension but that then will be plugged into my extendable lead.

I have a seperate plug for each cab:) so ill do them seperate. I cant get anywhere near the back of the cabs lol there just to big, im thinking, if it will work, to move all the wires up to the top cabs plus fan speed controller, extension lead etc then connect my main extension lead to an extendable lead and run that down inside side of the cab and out as ive got them now. It would mean 1 wire in the cab which i could get truncking for, if this is stil dangerous the only other option i have is to do the same and have the lead running down the outside of the cab into the plug socket.

If i can do it this way it will make life alot easier as i already have the holes drilled for the extension lead and a hole in the side of the cab for the lead to go through into the plug cocket. It would only probably take me half a hour and job would be done. I just need to know about the extension leads.

Also as i say above the lead to the light, im still gonna have to have 90% inside the cab so i can lower the lights, im thinking just a tiny bit of the led cable going into the top cabs so i can fit a plug on it and the rest will be slack in the cab for lowering purposes?
 

BudBaby

Active Member
Ive got all the wires sorted, i went with running the extension lead inside the cabs then out, i wont be able to truck in because they run a bit diaganol, ill post some pics later. Basically all there is now in the main cabs is one wire(extension lead) runing down the side of the main cabs and out into the wall socket, i think ill use some tape to cover them. The lead to the lights are just long enough to fit so thats good.

I cant see there being a problem with these extension leads there rated to 1200 watts and theres nothing like that amount going through them. As i say the main extension lead is plugged into an anti surge lead anyhow. Top cabs are a bit untidy but ill have a mess around tomorrow but to be fair if it works im not that bothered.

All thats left tomorrow is seal the new holes where cables have gone, cut airline down to size abnd fix the airstones to the bottom of the buckets. Then hopefully Friday i can get cracking:)
 

stelthy

Well-Known Member
Ok cheers for that mate i get the idea. Let me know about these extension cables, im not sure if an anti surge extension lead plugged into a standard extension lead will still give me protection, i cant see why not as all my stuff will still be plugged into the anti-surge extension but that then will be plugged into my extendable lead.

I have a seperate plug for each cab:) so ill do them seperate. I cant get anywhere near the back of the cabs lol there just to big, im thinking, if it will work, to move all the wires up to the top cabs plus fan speed controller, extension lead etc then connect my main extension lead to an extendable lead and run that down inside side of the cab and out as ive got them now. It would mean 1 wire in the cab which i could get truncking for, if this is stil dangerous the only other option i have is to do the same and have the lead running down the outside of the cab into the plug socket.

If i can do it this way it will make life alot easier as i already have the holes drilled for the extension lead and a hole in the side of the cab for the lead to go through into the plug cocket. It would only probably take me half a hour and job would be done. I just need to know about the extension leads.

Also as i say above the lead to the light, im still gonna have to have 90% inside the cab so i can lower the lights, im thinking just a tiny bit of the led cable going into the top cabs so i can fit a plug on it and the rest will be slack in the cab for lowering purposes?
No worries dude, There should't be a problem, but if you can try to get all surge protected extension cables :) Seperate plugs for each cab is a good idea and should be easier to keep tidy and in check! Yeah go for it man :) Thats correct man you'll be able to feed the LED power cable up n out the way into the top section, this will give a flawless finish and also be productive :)

Oh,,, Ps/ Have you got GREEN CFL's etc for night gardening? Plants cant see green light, and so we can see what we need to without messing up the plants day/nights I'll post a pic of mine to give you an idea :-


Let me know what you think.... Any kind of green light is great, but they dont need to be huge on wattage...Just enough to see what your doing. - STELTHY :leaf:
 

stelthy

Well-Known Member
Ive got all the wires sorted, i went with running the extension lead inside the cabs then out, i wont be able to truck in because they run a bit diaganol, ill post some pics later. Basically all there is now in the main cabs is one wire(extension lead) runing down the side of the main cabs and out into the wall socket, i think ill use some tape to cover them. The lead to the lights are just long enough to fit so thats good.

I cant see there being a problem with these extension leads there rated to 1200 watts and theres nothing like that amount going through them. As i say the main extension lead is plugged into an anti surge lead anyhow. Top cabs are a bit untidy but ill have a mess around tomorrow but to be fair if it works im not that bothered.

All thats left tomorrow is seal the new holes where cables have gone, cut airline down to size abnd fix the airstones to the bottom of the buckets. Then hopefully Friday i can get cracking:)
Good good :) Am looking forward to lots of pics.. Tidying/organising top cabs is one of the last jobs to do :) roll on Friday :)...ooop .. Thats today :) !!! I wanna see lots of pics and 'lets get the Grow on the Go' :) - STELTHY :leaf:
 

BudBaby

Active Member
Ok mate ill get pics posted tomorrow i promise. I stuck 2 discs to the buckets with silicone yesterday and they bonded great so ive done the rest today. Tomorrow ive just got to cut the airlines down to size and seal all the cable holes and give the cabs a good clean out then Sunday i will be able to start.

Im really exctied, ill get the top cabs tidy as i go along, im not to fussed to be fair as long as the main cabs are tidy that will do me.

How exactly do i get started mate lol, i have read to soak the rockwool cubes in water then shake them excess off and add the seeds and rip a bit of rockwool off the bottom of the cube to cover it? Is it just a case of leaving them in the propogator then?
 

stelthy

Well-Known Member
Ok mate ill get pics posted tomorrow i promise. I stuck 2 discs to the buckets with silicone yesterday and they bonded great so ive done the rest today. Tomorrow ive just got to cut the airlines down to size and seal all the cable holes and give the cabs a good clean out then Sunday i will be able to start.

Im really exctied, ill get the top cabs tidy as i go along, im not to fussed to be fair as long as the main cabs are tidy that will do me.

How exactly do i get started mate lol, i have read to soak the rockwool cubes in water then shake them excess off and add the seeds and rip a bit of rockwool off the bottom of the cube to cover it? Is it just a case of leaving them in the propogator then?
Sweet more pics the better :) Am anxious to get started....Sunday can't come soon enough :)

What do you think about the adding of 'Green Night lights' ?? They are very handy to have.... Ok before we start have you printed off your 'Grow Guide' yet ??

There's a few ways of starting your seed's there's the soak and squeeze method which involves the heated propergator and a light nuit mix, or my personal fav method is to do the soak n squeeze then add them into their DWC pots (filled with PH balance water '6.5' and starter nuits) ..have the whole unit set up n running MINUS the lights and around a week later they are all settled in and awaiting their first taste of light :) - STELTHY :leaf:
 

BudBaby

Active Member
Sweet more pics the better :) Am anxious to get started....Sunday can't come soon enough :)

What do you think about the adding of 'Green Night lights' ?? They are very handy to have.... Ok before we start have you printed off your 'Grow Guide' yet ??

There's a few ways of starting your seed's there's the soak and squeeze method which involves the heated propergator and a light nuit mix, or my personal fav method is to do the soak n squeeze then add them into their DWC pots (filled with PH balance water '6.5' and starter nuits) ..have the whole unit set up n running MINUS the lights and around a week later they are all settled in and awaiting their first taste of light :) - STELTHY :leaf:

I was hoping to run the lights at night to be honest, there is rarely anyone here at night apart form me and wife and people do just pop round during the day unexpected so if we can get away with doing it like this then i would prefer to.

Ive just been on the canna site to do my grow guide, wasnt sure on whether to put light feeding or normal or heavy. It suggests light if you dont know but thought id ask you first. Also the res size, my tubs are 27ltrs so do i put that? Im only asking because they wont be full obvioulsy and was wandering if this made a difference?
 

BudBaby

Active Member
Right all done:):):) Its just seemed never ending lol but worth it.

I think i would rather go the propogator route, purely because ive bought one now lol so i may aswell use it.

Pics below. I just await your approval lol and the go ahead to start now:) Ive been thinking about when i want to be havng the lights on and i think your probably right to have them on in the day because anything i need to do then i can do at night when nobody is here. Im not sure where i got the logic of runing them at night would be better and any gardening in the day would be more stealth lol.

Ive got my big res tub to mix nuites in here, it holds at least 50 ltrs and from what ive read you have to mix all the nuits up and then leave for 24 hours to get an accurate ph reading so im gonna have to do 2 plants one day and 2 the next unless again my logic and reading is way out lmao.

Heres a few pics
 

Attachments

stelthy

Well-Known Member
Right all done:):):) Its just seemed never ending lol but worth it.

I think i would rather go the propogator route, purely because ive bought one now lol so i may aswell use it.

Pics below. I just await your approval lol and the go ahead to start now:) Ive been thinking about when i want to be havng the lights on and i think your probably right to have them on in the day because anything i need to do then i can do at night when nobody is here. Im not sure where i got the logic of runing them at night would be better and any gardening in the day would be more stealth lol.

Ive got my big res tub to mix nuites in here, it holds at least 50 ltrs and from what ive read you have to mix all the nuits up and then leave for 24 hours to get an accurate ph reading so im gonna have to do 2 plants one day and 2 the next unless again my logic and reading is way out lmao.

Heres a few pics


Looking good man! Remember to attach the 2 Odor Socs to each of the in-lets :) Its also a good idea to completly clean the Growroom and room the units are in with Multi Purpose Cleaner and hoover everywhere like crazy!!! get the rooms in medical cleansed condition, this will help stop any bugs from entering the Growroom and keep dust etc to a min...this will help preserve the life of some of your equipment as well as make for a perfect grow cab.

Its probably a good idea to run your lights throughout the night.. (alot cheaper on the leccy bill) Cheap time is 7pm to 7am. So running your VEG panels from 7pm to 1pm, and then keeping them in complete darkness (Unless by green light only) from 1pm to 7pm. This will help keep running costs as low as possible, as well as helping slightly raising the temps of 'our' night time.

Nb/ Our night time is generally colder than our daytime.. so if the plants LEDs switch off during our night time, the Cabs temps will drop! So by running your lights at night during this cheaper period the plants will also benifit and so will you :)

So... Is tomorrow the big day ?? We should tie a red ribbon or even a GREEN one across the front and snip it like they do in films at opening events :) lol.

Keep both your in-line fans on 24/7 (when both cabs are in use), or just the VEG cabs in-line until you are using both cabs.. This will maintain a good humidity and constant supply of fresh air (A very good thing) !! :)

Yeah changing 2 pots a day sounds like a good idea :) nice pics too man! - STELTHY :leaf:
 

BudBaby

Active Member
Yes mate i think everything is done. Ive given the walls of the room the cabs are in a good wipedown today and the inside of the cabs, ill do it again tomorrow and hoover again also.

Do i have to do a ph test of the water i have to soak the rockwool cubes in? Let me know because if i do ill have to pore a bit of tonight and let it rest for 24 hours.

Also for starters is it a case of just soaking the rockwool in water and putting in the propogator and turning it on? Obvioulsy i have to put the seed in too lol:)

Could also do with knowing what you think about the nuits nchart i need to print off, dont want to get it wrong.
 

stelthy

Well-Known Member
Yes mate i think everything is done. Ive given the walls of the room the cabs are in a good wipedown today and the inside of the cabs, ill do it again tomorrow and hoover again also.

Do i have to do a ph test of the water i have to soak the rockwool cubes in? Let me know because if i do ill have to pore a bit of tonight and let it rest for 24 hours.

Also for starters is it a case of just soaking the rockwool in water and putting in the propogator and turning it on? Obvioulsy i have to put the seed in too lol:)

Could also do with knowing what you think about the nuits nchart i need to print off, dont want to get it wrong.
I WOULD use PH balanced water for 'Everything' :) that way you cant go wrong :)

Have you decided whether your going to start them off in the propagator or put them straight into bubbling DWC tubs?

To start with you dont need to worry about clearing the Chlorine, as the ladies are still in seed form - the Chlorine will evaporate before any green matter has had a chance to develop :)

A good technique to get the seeds to develop is to get a small matchbox and line it with medium sandpaper, put 1 seed in at a time and shake the crap out of it for a couple of minutes, this will soften the shell and allow the water to penetrate alot quicker, thus starting the growth of your girls alot sooner :)

If your going to use the PROPPAGATOR ....


* Shake 4 seeds individually in the sandpaper lined match box for 2 mins

* Place 4 Rockwool cubes in a desert bowl

* Place 1 seed in each of the Rockwool cubes (Center) about 1CM in

* PH balance a Pint of tap water

* Submerge the Rockwool+seed cubes in the PH balanced water and once soaked through lightly squeeze till a bit of drainage is achieved.

* Replace all four Rockwool+Seed cubes in the desert bowl and pour in some PH balance water (about half way up the cube in depth)

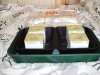
* Place the Bowl in the middle of the heated propagator

* Pour the remaing water in the tray of the Propagator (around the outside of the bowl)

* Put the lid on the Propagator and make sure the top vent is closed

* put the Propagator in a fairly dark area

* Plug in and turn on the Propagator


Your seeds will/should germinate in anything from overnight to a couple of weeks time, once a couple of real leaves (not 1st tiny round leaves) have sprouted, its time to transplant them into the DWC Hydroclay filled pots etc...


Please note: Its a good idea to remove the lid of the propagator at least twice a day, do this and wipe away the condensation that has transpired, The seeds do like condensation and a high humidity but stale air and water is never a good thing so by wiping twice a day ie once in the morning when you awake and once in the evening... say.. before you hit the sack should be about right :)


CANNA GROW-GUIDE


You say your pots are 27L....I'd say set your Grow Guide up for 25L because as I am sure your aware you dont fill the pots to the brim (the water level should be at least 1.5" under the seeds position)......Ill have a look and take a pic n upload to make sure you have it all correct! :)

Once you have printed off the Guide its a good idea to cut the Guide to size and laminate it with that clear stuff kids cover their school books with on both side... this will keep it splash/condensation proofed and preserve its life...I have stapled mine tidly in side my cab at the top of my cab doors, You'll refer to this Guide countless times, so keep it safe or staple it in you cab some place out the way :)

Hope that helps - STELTHY :leaf:
 

BudBaby

Active Member
Just been looking at my metre and im giving it a soak in ph 7 liquid for 2 hours to get a faster reading. I have 3" rockwool cubes, i havent got a bowl big enough for them but i do have 2 trays with my prop that fit 2 cubes in very nicely.

Can i use these trays as my bowls? They have got holes in and underthem will be an absorbant mat to help maintain moisture, basically can i use my propogator as the bowl sort of thing? I cant see why not its sort of how the box it came in tells you to do it. Im just gonna have to try the 4 seeds as thats all my prop will allow me.

As soon as this ph mentre is soaked enough im gonna have a go:) Wish me luck:)

Ill attatch a pic of my propogator to show you what i mean.
 

Attachments

Top