Any help designing Drip Irrigation assembly infinitely appreciated

After hours of stimulating labor, I've finally assembled my new 8 1,000 watt flowering room, and I've got a little time before I'd like to fully implement the automatic drip irrigation aspect of the whole thing. I'm running 128 5 gal. smart pots filled with Botanicare CocoGro (this is superfluous information at the present time, but I may as well lay it all out there, every bit of info can help), and I'm looking to get the whole thing on an automatic feeding regiment, but I only have the vaguest idea of how to do this effectively. In theory, it makes sense, it's just that I start to get a little confused with all of the different size fittings.

Maybe someone could save me a whole lot of time by linking me to a DIY step-by-step on assembling an automated drip assembly.

If not, I'll give you a run down of my general strategy as it stands today:

I have 2 275 gal. reservoirs, one for food, one for RO water. I have both a 1,000 and 1630 GPH SunLeave submersible pump for each Res, though I'm thinking about using the smaller one just because the 1630 might be excessive, not sure though, haven't tried it out just yet.

Both the Res' sit outside of the room with the pumps submerged.

I have a Rainbird 6 Zone sprinkler timer and 2 Pre-assembled 2 Solenoid Valve manifolds that screw together, giving me 1 solenoid for each tray.

My vision is to run the hose from the pump in the Res to the Solenoid Valve Manifold, where the water will be distributed down one of the 2 rows of 2 4x8 trays. The Rainbird Timer will turn on only one Solenoid at a time, so that only one tray is being watered at once to ensure strong PSI (let me know if you think I'll have too little or too much PSI for what i'm planning to do here, I really have no clue) for the spray emitters.

Coming from the Solenoid Valves will be 1 inch PVC piping that will connect to a 1 inch 4 Way at the beginning of the tray, with one row of 1 inch PVC continuing straight down the center of the tray and a row running down the length of the tray on each side.

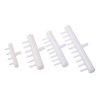
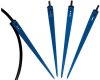
I'm going to drill holes directly into the 1 inch PVC and place Spaghetti Tubing inside with rubber grommets to seal the holes. The spaghetti tubing will lead to Orbit, ~max 29GPH spray emitters which are rated to run at 25 PSI. There will be 2 emitters per pot.

I'm hoping to find a Pump Start Relay to hook up between the pump and Rain Bird timer so that I won't have to put the pump on its own timer - seems to rough around the edges that way. I want it all to be controlled by the timer itself.

I'm just wondering if, given the parameters I've laid out here, I might have overlooked anything. Too much pump? Too little pump? Different emitters? Different size piping?

Any help in actually designing the whole assembly from Res to finish would be invaluable; I'm new to the whole drip irrigation thing and it seems lie I might be missing something here...

(I'll post pics of the room once I get a new charger for the camera)
 

EmeraldPawn

Member
That is a good project you have going. CAP sells a digital timer you can set up "On" from 1 sec to 10 miutes, OFF cycle from second, minutes or up to hours. Good for those little fine tuning adjustments or, cloning machines so the reservoir doesn't heat up. Although I have used the Octopus type manifolds with great success all that specgetti really is time consuming, confusing and so I came up with an alternate plan I am just adding to my SOG. I am using 1/2" pvc line overhead and above each plants trucnk base I have a "Tee" fittting. I drilled a hole a little smaller than the dripper emiter, used a screw to Tap the plastic. I also used a very small dab of aquarium sealer on the threads. The reservoir is under my table, the pump line comes up from underneath the table and connects to each line, one pump for each line. If your allowing your system to recirulate then of course you would have your return line. With SOG I don't want to be fussing with the drippers in the lower canopy and likewise with a larger scale you have overall your maintenace would be greatly reduced. I suppose the black hard plastic line would be better than pvc pipe in your case
and you could tap the line as needed with either a emitter or soaker hose or both. Here I thought I was the King of Swing:)
 

GreenThumbSucker

Well-Known Member
You definitely don't want to recirculate using coco. I had a friend that tried it and the coco clogged everything within a day. I assume you are running drain to waste? Do you have anything built yet?
 

hardhat

Member
Any updates?

I am in the process of assembling my 10x1000w flower room and am trying to figure out the best way to water my garden...

I like the approach...
 
Thanks for the replies.

I'm fairly sure I was just over thinking the whole thing.

I decided to mount the solenoids on plywood that itself is mounted on the outside wall of the room, to the right of the rezes. I have 1" couplers that I'm going to use to attach the outputs of the solenoids to the 1"pvc piping. I am then running the piping through the wall below the solenoids and into the room, where the will each branch off their respective trays. Three or four rows per tray, not sure just yet. I'm planning on placing 32 smart pots per tray. Secure the piping, cap the ends. Drill holes in the PVC rows for 1/4 in spaghetti tubing. Run tubing from PVC piping to pots; I'd like to do 2 full circle spray emitters per pot, but am debating what type of emitter set up I want to use. Micro spray? I'm going to have to go and toy around with some pieces in the hardware store, but my main concern is that it spray downwards instead of out or up. Unfortunately, I am missing a few key components for the tray stands and the stores are closed until Monday, so I kinda have to just occupy myself with small work til then. I'll be getting a cord for my camera soon so that I can try and take step by step pictures of how I'm building this thing.

Oh, and it is drain to waste, by the way. The floor of the room tips well enough in one direction that I'm able to drill a hole in the end of each tray in which I'm placing a PVC pipe (I believe it's a 3/4 inch Slipx standard female hose fitting, also 3/4 I believe). I attach 50 ft light duty garden hose to the threading on the bottom of the drain that sticks out beneath the trays and run the hosing outside, to water my lawn with the excess. Just move the drain hoses around on the lawn each day. Working great thus far for the RO waste water! haha
 

polyarcturus

Well-Known Member
Alot of folks just read :)
thats all i did for the first year i joined(other name).

i had no idea wtf a forum was, how it worked, what IMO fucking meant. needless to say i was lost for a long time. i dont lurk here but i lurk elsewhere. dont have to post all the time man, and damn 3 years later at least he posted some good shit worth reading, right?:D
 

GreenThumbSucker

Well-Known Member
As for a drip assembly....

Here is the cheapest easiest way to set up drip.

Plastic air stone manifold - $3
18235-23791.jpg
Cheap water pump - $16
1/4 inch airline - black preferably
Drip stakes, can be bought at most hardware stores
Blue_Cage_Drip_Stakes.jpg

3/8 inch poly hose to connect the water pump to the manifold.

That's all you need.

Put the 3/8 nipple on the water pump. Attach 3/8 poly hose between pump and manifold. Attach 1/4 inch tubing to manifold and run two to each plant.

Put it on a timer and run once per day until they drip out the bottom of each pot. Simple, cheap and it works.
 
Hey y'all! I've been incredibly busy, as I'm sure you can imagine! Hahaha

Okay, so where to start...

I suppose I was just overthinking the whole thing. Let me give you the run down, and then I'll post some pics to top it off (assuming I can figure that out. As someone pointed out before: I've been on this site 2 years and only posted 3 times. Hahaha. Haven't had much call to til recently, I suppose. That, and not having a digital camera made the thought of posting a journal a boring one.).

I ended up getting two 275 gallon Rezs (the ones that come in cages with a nice platform to sit on) and placed them against the outside wall of the grow room.
P1000082.jpg

I have two fat air pumps plugged into both... 110liters per minute, I do believe. The one in the feed tank is plugged into a large air stone disc, and the R/O tank utilizes 8 of the outlets with medium large air stones. Not sure what the exact size is, but they're somewhere around 6 inches tall.


Here's where I'll get into the actual auto-feed system that I worked out:

I have a 1000gph hydrofarm pump in each Rez, though I'm going to switch to a 1/2hp or 3/4hp sump pump (bottom feeding) next round. It's not that these aren't working for my set up - they do. It's just that I'm going to change my emitters next round, and I'm sick of having a fair amount of fertilizer left in the Rez at the end of the night, since these pumps I have currently feed from the side and, consequently, leave the fertilizer in the tank at a depth of 5 or more inches.

The pump in the Feed Rez is hooked up to a timer that is set to turn on for 30 minutes every 3 hours. If I had more cash and a hardware store that wasn't an hour away, I might have been able to get a Pump Relay, but no one at the hardware store had heard of one, for whatever reason. With a pump relay, I could somehow hook the pump up directly to the Rainbird 8 Zone Irrigation Controller, and it would turn the pump on automatically for the duration of the programmed feed.
P1000085.jpg

I have a 1 inch wide rubber tube connecting the pump to the intake of the Solenoid Valve Manifold.
The 4 Solenoid Valves are wired to their respective zones (1-4) on the Controller. The outputs of the Solenoids are connected to 1 inch PVC pipes with a simple PVC slip coupler. I then just conneted PVC pieces like Legos down the wall, and into the room through the bottom of the wall. Each PVC pipe then goes to its own tray, which is resting on some home-built tables - fatty tables, in my humble opinion.

The tables lift the trays, I can't remember... 10 inches or so off the ground. The PVC pipe comes 90 degrees up from the floor to the front of its respective tray, where it branches sideways, and then those two PVC rows 90 degree and run the 8ft length of the tray. These are the main feed lines.
P1000088.jpg
I drilled holes, not sure what size, just large enough for spaghetti tubing to be squeezed in without much difficulty. When I drill the holes next time, I'm going to make sure they are all on the bottom of the pipe, and level. Not having level holes has caused some emitters to receive greater water pressure than others.

I then plugged spaghetti tubing into the holes, ran one line per pot, added a t barb at the end of each, and looped them to make circles around the stalks. I then drilled (and stabbed) holes in the ring of spaghetti tubing, so that it waters 360 around the pot. Next round, I'm going to opt for the spray emitters.

The trays have a 3/4 in hole cute into the bottom, where I plugged in a simple 3/4 in. hose adapter (caulked and sealed with silicon), and plopped a little screen on each drain. These drains are attached to hoses which I run out of the room, where they subsequently water my lawn after each feed!

I placed my plants in 5 gal smart pots filled with coco and 1/5th perlite, 4x8 per tray. The PVC Feed Lines are in between the first and second, and 3rd and 4th rows, running the length.


The Controller is rigged up so that my garden is fed for 4-7 minutes (depending on whether I'm flushing or feeding or whatever), every 3 hours, 4 times during Lights On.

Everything else is rigged up on timers as well, but the room uses up my 50 lb co2 container in, like, 3 days. It feels pretty sealed - I'm not sure what the deal is there. It could be the shitty C.A.P ppm-1 or 2 or whatever-that-super-basic-one-is C02 controller. It never turns off, because it constantly reads the room as having less than 1500 ppms. Strange. It could also be measuring incorrectly because the C02 line I made out of spaghetti tube I had on hand, that I just drilled a sh*t-ton of tiny holes into, isn't distributing correctly. Hahaha. Whatever. Something for next round.

Right now I have to keep the doors open, anyhow, because the air conditioner (IdealAir Commercial Portable 21,000 BTU) isn't cooling the room effectively. It's only 2 years old, but I never used it in a room with more than 6 lights. Should it be sufficient? I'm not sure, but as it stands, the room is too warm (running 84) with the A/C on pumping air in while the doors are closed. It could be because the outputs (5 inches) are currently duct taped to 4 inch ducting, which distributes it throughout the room via holes I tore in it. Haha. As it is right now, I have the doors open, the A/C running, on each row of 4 lights I have an 8 inch fan pulling air in from outside the room and pushing air through 2 lights, where it is connected to another 8 inch fan pulling air out of the room and around a bend and out the window in another 20 or so feet. I even have an 8 inch fan sitting on the floor outside next to a slightly open door, where it is pumping fresh air through ducting into the room all night. I also have 4 oscillating fans pushing the air inside the room around.
P1000089.jpg

I figure this impromptu cooling system will work for now, and that it has the added bonus of replenishing a fair amount of C02. The obvious downside is that my room can't be sealed when the doors are wide open. Duh. This leaves me open to pests and other ailments. So far, I had fungus gnats move in that I didn't squash as thoroughly as I should have when I realized I was going to have to leave the doors open. I just sprayed the pots again tonight with a gnat spray (nasty stuff, felt bad for the poor roots :-(), and set up gnat traps in some of the pots. They're not too bad; only about 20% of the pots have visible gnats, and the worst of those had a population of 6 or so before spraying.

So yeah... I think that should cover the basic room info, for the most part. I'm running AN GroMicroBloom plus some additives (humic and fulvics, Big Bud, Overdrive, and a few others), as well as feeding compost tea, Hi Brix molasses, and Hygrozime once every 2 weeks or so.

I'd like to switch nutrient lines to a coco specific line that isn't AN. AN has been working, but I feel it's broken down too much, too many additives at too high a price. I was thinking Canna, having seen good results.

Okay, there you have it! This post should now be able to serve as some kinda resource for the next individual starting their own auto feed.

I'd love to hear feedback.

Enjoy the pics (assuming they work!)

The plants pictured are Critical Kush at 4 weeks. I have some Blue Dream under one light and some supposed Train Wreck under another (You can see some TW branches peaking out of the left side of the frame on one of the pics). I say supposed, because this train wreck is the most Sativa lookin TW I've ever seen. It doubled in size after being switched to 12/12, each limb growing as long as the entire main stalk. These TW have only now, at 4 weeks, started putting on little buds. It's a shame. I hadn't expected them to grow like this, or I would've pruned them out way more heavily and put fewer in there. Oh well. I'm hoping I can finish up the CK quick enough to spread these TW out on a full tray. I just hope it won't be too late, because a lot of the flowering sights on the TW (and there are a LOT) are in poor light.

P1000087.jpg
P1000090.jpgP1000091.jpg
 

PetFlora

Well-Known Member
In the last photo I see some leaf curl.

Check out my new thread where I will be using Halo drip rings
 
Yeah, like I said - temps are a bit too high for my liking. That, and I was pushing the ppms up as high as I could before entering the fourth week. Not much I can do about the temp for now; the hairs aren't withered and the buds directly under the light are super dense so I'm not stressing. I heard somewhere that curling leaves could be a symptom of cal-mag deficiency, and since I'm running coco for the first time, I could see that happening. I've been applying 200 ppms CalMag with every watering and feed since the second week, so it shouldn't be that... Also there are a few purple petioles, which I'm chalking up to the CalMag or K deficiency I was experiencing while vegging. It should be taken care of at this point.
 

xoddah

Member
""(let me know if you think I'll have too little or too much PSI for what i'm planning to do here, I really have no clue) for the spray emitters.""

your pumps are fine, use 3/4 or bigger tubing all the way from the pump to the emitters, pressure and volume to the last possible point
of final distribution... then... make ALL of your 1/8 inch lines exactly !! the same length, if the longest one as 12" make then ALL 12 inches
the water will take the path of least resistance and they will not feed evenly... trust me i run very similar size room, 100 pots
 

xoddah

Member
Right now I have to keep the doors open, anyhow, because the air conditioner (IdealAir Commercial Portable 21,000 BTU) isn't cooling the room effectively. It's only 2 years old, but I never used it in a room with more than 6 lights.

From the school of hard knocks ... I upped my cooling from 12000 to 24000 to 36000 for 12 1000W lights, still hot ....fans and more fans
still hot.. MY problem was I had set up a carbon filter with a 12" fan on the floor to remove hot air, ducted outside, IT was sucking the cool air off the floor ... I shut it off, closed the doors, and now 2 12000 btu a/c-s will keep the room at 75 on a hot 100 degree day, my room is mega insulated with 2"Styrofoam panels over r34 sheet rocked walls, 10 foot ceiling, with insulated and ducted attic ... my point is check closely your venting 21000 btu will cool a pretty big house very comfortably, something simple may have been over looked
 

xoddah

Member
very ... nice setup, lots of thought time and effort
little fine tuning here and there maybe but you got it mister
 
Top