MidnightSun72
Well-Known Member
Watch your backs now hoes. Jk. You guys totally inspired me to finally get this.

$$?? I mean did you find a deal?Watch your backs now hoes. Jk. You guys totally inspired me to finally get this.
View attachment 4934812
$1250 CAD assembled. Which is less than I can buy it for from PRUSA (999USD+ shipping and customs). It's from a local guy who buys them 20 at a time from PRUSA. Also saved me from having to wait for them to put me in the build que and then waiting for shipping.$$??
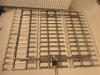
nice one!!!...Watch your backs now hoes. Jk. You guys totally inspired me to finally get this.
View attachment 4934812
I am pretty good with sketch up. Been using it since it was invented almost lolnice one!!!...
i am far from a 3d print expert but if you are struggling with anything let me know ill do my best help.
have you ever used any 3d cad software before?, i started on sketch up but then moved onto fusion 360...
ah great, sounds like ill be coming to you for advice!.I am pretty good with sketch up. Been using it since it was invented almost lol
Lmao. I'll be the one coming to you to get advice. I got zero prints under my belt soooooo. Should be fun.ah great, sounds like ill be coming to you for advice!.
i liked sketch up but for some reason i just got on better with fusion 360... looking forward to what you come up with...
use decent quality filament and the standard settings in prusa slicer and it should just work...(fingers crossed)...Lmao. I'll be the one coming to you to get advice. I got zero prints under my belt soooooo. Should be fun.


ok 3 built and assembled into my 6ft x 4.5ft beast...
View attachment 4935095
View attachment 4935096
driver board...
View attachment 4935097
View attachment 4935098
hung and on...
View attachment 4935101


exelent work man!, you are handy in sketch up!!!...It took me like 3.5 hours to download all the software and download the new sketch up to export STL files. But I finally got my first print started.
View attachment 4936004
View attachment 4936003View attachment 4936002
View attachment 4936008
View attachment 4936006View attachment 4936007View attachment 4936009
looks like the print turned out nice. looks like you used the supplied pla?, i have used petg for my prints it handles heat a little better and is a touch more flexible but pla will work fine.It worked!!! New fave toy!! This little retainer will keep me from having to use any screws on my build. Pins the last 2mm of the strip down.
View attachment 4936032View attachment 4936033
View attachment 4936034View attachment 4936035
looking good! on the 10 board build is the idea behind the multiple drivers so you can set a more even ppf over the canopy?. corner boards ran hardest then the outer middles a touch less and then the center two a bit less again?...So not quite done yet, waiting on wire for the power cord and 5mm screws for the endcaps, but decided to go for some QB288s at full power to see how they compare with running at low current.
Each board gets its own 150W driver. 3 V2s and one Rspec. Going into a 4x4.
View attachment 4936138
View attachment 4936135View attachment 4936136View attachment 4936137
Got another fixture up next that will use all 10 of my V1 boards running at 40-50w each so they don't need heatsinks. Will be the comparison to this fixture I just posted. this will use a 80w driver for 2 middle boards, a 200w for the 4 corners, and another 200w for the outer center 4 boards.
View attachment 4936140
been using sketch up on and off for work and play for last 12-14 years or so. They made us use it on our final design project in university and I hated it. But weirdly it was so intuitive and accessible. I went back to it on my own. Lolexelent work man!, you are handy in sketch up!!!...
Ya just the supplied roll in silver. I'll be picking up some more colours and material types to experiment with.looks like the print turned out nice. looks like you used the supplied pla?, i have used petg for my prints it handles heat a little better and is a touch more flexible but pla will work fine.
looking good! on the 10 board build is the idea behind the multiple drivers so you can set a more even ppf over the canopy?. corner boards ran hardest then the outer middles a touch less and then the center two a bit less again?...
looking good! on the 10 board build is the idea behind the multiple drivers so you can set a more even ppf over the canopy?. corner boards ran hardest then the outer middles a touch less and then the center two a bit less again?...