You are using an out of date browser. It may not display this or other websites correctly.
You should upgrade or use an alternative browser.
You should upgrade or use an alternative browser.
DIY Storage Box Grow Room
- Thread starter Where in the hell am I?
- Start date


Where in the hell am I?
Well-Known Member
Where in the hell am I?
Well-Known Member
Where in the hell am I?
Well-Known Member


Where in the hell am I?
Well-Known Member
Switch steps 3 & 4 
Where in the hell am I?
Well-Known Member

Where in the hell am I?
Well-Known Member


Where in the hell am I?
Well-Known Member
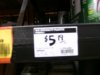
Step 7:
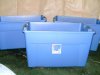
Select reflective metallic spray paint, and a can of plastic primer spray paint. If ya try to just paint w/out the primer, the paint will not adhere very well to the plastic. I could not find a reflective metallic paint fer plastic, hence, the primer, etc.
I used spray paint, 'cause I couldn't find mylar ANYWHERE! This seems to work perfect, however!
Attachments

Where in the hell am I?
Well-Known Member


Where in the hell am I?
Well-Known Member

Where in the hell am I?
Well-Known Member
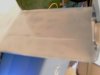
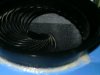
Step 10:
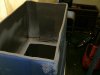
Go ahead and spray w/metallic after the primer is dry.
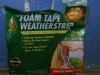
Now (after all paint is dry), go ahead and flip the containers upside down. With foam tape, so ahead and line the bottom so that the containers will fit nice and snug. After you stack them all back up, go ahead and look fer light leaks which are easily fixed w/strategically placed foam tape.
Go ahead and spray w/metallic after the primer is dry.
Now (after all paint is dry), go ahead and flip the containers upside down. With foam tape, so ahead and line the bottom so that the containers will fit nice and snug. After you stack them all back up, go ahead and look fer light leaks which are easily fixed w/strategically placed foam tape.
Attachments
Where in the hell am I?
Well-Known Member
Step 11:
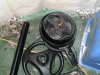
Choosing the proper tools, you can take any household fan and use it how ya wud see fit fer yer application.
I used a standard free standing fan that I had layin in storage and disassembled it just fer me
Choosing the proper tools, you can take any household fan and use it how ya wud see fit fer yer application.
I used a standard free standing fan that I had layin in storage and disassembled it just fer me
Attachments

Where in the hell am I?
Well-Known Member

Where in the hell am I?
Well-Known Member
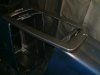
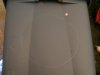
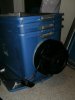
Step 13:
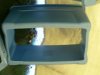
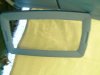
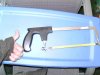
Using soapstone (or watever ya want), trace the fan just a lil bit bigger than it needs to be. Only about 1/8" larger dia is needed.
Set the cover of the fan in yer cut out, and secure w/some sort of epoxy. I, personally, used liquid nails, then went over that w/a clear silicone.
Using soapstone (or watever ya want), trace the fan just a lil bit bigger than it needs to be. Only about 1/8" larger dia is needed.
Set the cover of the fan in yer cut out, and secure w/some sort of epoxy. I, personally, used liquid nails, then went over that w/a clear silicone.
Attachments


Where in the hell am I?
Well-Known Member
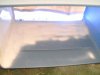
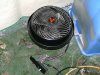
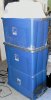
Step 14:
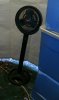
Here it is all together. The size of container that I selected works perfect fer my 400W air-cooled hood. I will have an exhaust fan on the hood, and possibly another exhaust fan cut into the middle of the stack.
You can see here, that if done the way I did it, ya can even stack them all back fer storage, even w/the fan still attached!
Attachments
Where in the hell am I?
Well-Known Member


entropic
Well-Known Member
DrGreenFinger
Well-Known Member
entertaining as well as informative. great job! 
Where in the hell am I?
Well-Known Member
TY! I haven't seen that 1 fer a while! Feels good to be compared, cause that 1 was tits! Think that now that I've seen it again, I'm gonna steal the CFL box, as well

Similar threads
- Replies
- 27
- Views
- 3K
- Replies
- 5
- Views
- 1K
- Replies
- 13
- Views
- 2K