Help with setup.

Headiesss

Active Member
I was hoping someone could explain in detail how to build a cheap hydro system that is easy to maintain and help me out. I would like to dabble with hydro but cant afford a big setup, just for 1 or 2 plants.
 
go to a big lots or similar store and buy 5 gallon buckets for $3 OR go to a bakery and ask for their buckets. One bucket per plant.

cut a hole in the bottom of the buckets I would say near a corner. Put some pvc/tubing to a 18 gallon tote and use that as the return line. The dollar store has a set of 4 cups for $1 that are a little over 3 inches wide so use a 3 inch bit on a drill or a jigsaw to cut that hole in the top of the bucket.

Use illustration to figure out rest.

Aeroponic properly setup is the most efficient way to grow your plants for maximum yield and potency.

-pot
 

Attachments

  • aeroponic.JPG
    aeroponic.JPG
    13.5 KB · Views: 29
Flood and drain table all the way man...Simple and easy to maintain, uses one pump and a timer! Very easy..
 
nope I converted my flood and drain to aeroponic and a buddy is using aero ... he cut off 2 weeks in flowering on his last harvest and the buds are BETTER... only thing he changed was flood and drain to aeroponic

with aeroponic you get more oxygen to the plant roots as well.


-pot
 
I was hoping someone could explain in detail how to build a cheap hydro system that is easy to maintain and help me out. I would like to dabble with hydro but cant afford a big setup, just for 1 or 2 plants.
there no kinda hydro any cheaper or easier than a good ole bubbler. and its alot more hands free than an aero. those can and will stop up. and when they do youve got hours to find and fix it or your plants are going to be sad lil things. with a bubbler youve got days (trust me its happened to me 2 times) to get a new air pump, and the air pump is all that can go out on a bubbler.
as for the yield on a aero being better,,, i would put a 30.00 bubbler head to head with a 300.00 aero and wouldnt be shocked if the bubbler out grew the aero.
list of parts needed are
1 fish tank air pump 6.00
1 20 gallon tote 4.00
2 air stones 5.00
air lines .75
air line "T's" .25
net pots 5.00
hydroton(lil clay balls, but you can use lava rocks if you have to) 5.00
what nutes u use is up to you.
thats all you need to grow a few plants. no reason to over complicate things. your first hydro grow should be as simple as possible. hope this helps
 
I just made a rather cheap drip stake system thats working great for me. It was my first time making a hydro system too, and I had no problems.

25962d1189270527-first-grow-northern-lights-x-day43_closet.jpg


You will need:

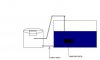
A leach tray or some other kinda tray with a drain on the end. I bought this for $10 at my local hydro store:
leach_tray.jpg

I inserted a 1meter rockwool slab into the tray which I set my 6" rockwool cubes on.
seedling_rockwool.jpg


For the drip stake system you will need:
pvc_flex.jpg

1" PVC Flex Tubing (I think this was $1.50/ft @ Lowe's) - I got 36" for my setup (1 meter rockwool slab). This is the main irrigation line that the drip stakes will come off from. I capped one end off with a threaded end cap, and the other I inserted an elbow joint to connect it to the pump (each was like $1):

endplug.jpg
elbow.jpg


To insert the drip stakes, I drilled 5 small holes evenly down the length of the flexi pvc tubing. In each hole I inserted these grommets with double ended nozzles (the thing on the left - the right piece isn't required). I found them in the lawn irrigation section at Lowes for like $5 for a 5pack. I used silicon sealant around each grommet to ensure a good watertight seal:
misterlandscaper.gif


I ran 1/4" tubing off of each nozzle and attached a drip stake to each of the lengths of tubing ($0.25 per drip stake):
quarterinch_tubing.jpg

drip_stake.jpg


You will need a water pump ($20-$30):
EcoPlus-SubmersiblePump.gif


Which you will place in your resevoir (Rubbermaid $3.50):
rubbermaid.jpg

Cut a hole in the lid on one end, to run the tubing from the pump to the main irrigation line.The drain lines will run back into this hole too. I used 1/2" clear vinyl tubing ($0.50/ft I got 20ft but didn't need that much):
clear_vinyl.jpg


Thats $66.50 so far plus whatever it costs for your grow medium (rockwool).

I only have to water, maybe every other day or every 3 days. I just plug the pump in and wait until the water starts to drain back into the resevoir. I placed screens over the drain holes in the tray so that no debris falls back into the res.

I didn't mention the pvc table I made to raise the system up 2ft so I could place the reservoir underneath. It was made using 4 5ft long pvc tubes (1.25" diameter). Each was $5. I also needed 4 elbows and 4 T-fittings (maybe another $10). I used them to make a makeshift support:
25134d1188720483-first-grow-northern-lights-x-closet_3d_pic2.jpg
 
There are a few simple systems out there, the bubble system is great, and if you are just doing a few plants then I would have to agree with big bad on this one. There is a member here that makes them, look for him, he is a cool guy. Just PM him, I am sure that he would not mind setting you up..His Member name is filthyfletch. Just don't tell him that you are using CFL's! LOL
 
well i plan to switch to a hps by the time i start to flower. thanks for the suggestions. ill look over them some more before i make a decision, and ill also try and get in touch with that guy. Money isnt necessarily a problem, and im not going to take any shortcuts because i want to grow the fire but at the same time i dont want to spend to much until i start procducing some bud.
 
Back
Top