BostonBuds
Well-Known Member
I have seen some people posting about issues with clones. I use simple steps, here is how I take clones and so far I have had great success. Maybe this will give people some ideas:
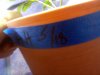
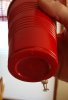
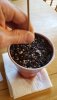
-Make proper drainage holes in the bottom of the container, I use solo cups poking holes with a thumb tack. This keeps the soil from maintaining too much water and drowning the clones.
-I fill the cup with potting soil making sure not to compress or pack it down, I like to leave the soil light and fluffy which helps with drainage. I thoroughly wet the soil and allow to drain, do this a few times because the soil takes awhile to absorb the water from being so dry in the bag. Try to remember how the cup feels, weight, which helps knowing when to water.

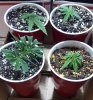
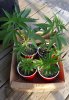
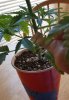
-Get the donor plant, cup of room temp water, a clean new sharp razor blade, a stick to make a hole in the soil, and the container. I'm using a plant started from seed, I will get a few clones off it.
-Carefully slice off the clone from the plant.
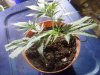
-Examine the clone and decide what to trim, on this one i'm just trimming the two small branches, the leaves on top are small enough to leave alone, if they were bigger I would probably trim them in half.

-Use the razor and carefully slice down the bottom of the stem in a 45 degree angle, I like to make the cut long.

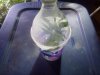
-Stick the stem of the clone in the cup of water.

-Make the hole down in the potting soil with the stick.
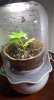
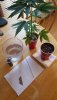
-Place the stem of the clone down into the soil, gently press the soil around the stem but make sure not too much that it compacts the soil down too much.
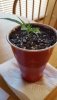
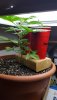
-I watered the cup again, making sure the bottom is draining properly. Because I was careful not to compact the soil the cup still feels somewhat light, remember how it feels for future watering. I use an old T12 shop light, seems perfect for seedlings and clones being able to have the tops of the plants close to the bulbs without burning.
Last year 100% of the clones I took ended up growing great. In my opinion the key is not compacting the soil and having enough drainage holes, this hopefully prevents the soil from becoming water logged. I will check on them daily and gently water as needed. In about 7 days i should start seeing new growth.
-Make proper drainage holes in the bottom of the container, I use solo cups poking holes with a thumb tack. This keeps the soil from maintaining too much water and drowning the clones.
-I fill the cup with potting soil making sure not to compress or pack it down, I like to leave the soil light and fluffy which helps with drainage. I thoroughly wet the soil and allow to drain, do this a few times because the soil takes awhile to absorb the water from being so dry in the bag. Try to remember how the cup feels, weight, which helps knowing when to water.
-Get the donor plant, cup of room temp water, a clean new sharp razor blade, a stick to make a hole in the soil, and the container. I'm using a plant started from seed, I will get a few clones off it.
-Carefully slice off the clone from the plant.
-Examine the clone and decide what to trim, on this one i'm just trimming the two small branches, the leaves on top are small enough to leave alone, if they were bigger I would probably trim them in half.
-Use the razor and carefully slice down the bottom of the stem in a 45 degree angle, I like to make the cut long.
-Stick the stem of the clone in the cup of water.
-Make the hole down in the potting soil with the stick.
-Place the stem of the clone down into the soil, gently press the soil around the stem but make sure not too much that it compacts the soil down too much.
-I watered the cup again, making sure the bottom is draining properly. Because I was careful not to compact the soil the cup still feels somewhat light, remember how it feels for future watering. I use an old T12 shop light, seems perfect for seedlings and clones being able to have the tops of the plants close to the bulbs without burning.
Last year 100% of the clones I took ended up growing great. In my opinion the key is not compacting the soil and having enough drainage holes, this hopefully prevents the soil from becoming water logged. I will check on them daily and gently water as needed. In about 7 days i should start seeing new growth.