iBLaZe4tozErO
Well-Known Member
opps quoted wrong person LOL.
the compassion center i vend to loves my hash. they actually charge 5 dollars more a gram for it. they want it formed into gooey balls. the powdered hash/keif sells for half the price. how do i dry it yet still form it into gooey balls? i've tried drying it and it turns into hard rocks. then i have to grind it and hot press it. this turns into a lot of extra work. looking for a way around this. i do find that if i store my hash in a sealed container it will start to form mildew on the surface. i solved this by simply storing in a breathable container or the freezer. once again i'm looking to avoid this while still maintaining my gooey balls.
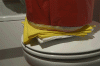
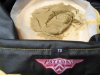
i'm scared. when i let it get too dry it gets hard like gravel and won't bind together. what do i do now?.................View attachment 86614
aqua labs take on heat seems kool take a oven bag then put hash in one corner. Dip it in warm/ hot water temp may vary. Then press

WOWOWOWOW!!!!
let me find out FDD is a hype man on the low!!!

 i give 'em 4 outta 4
I dont know if you read the comment in the other thread but you have to use heat to press the hash...dont you?
i just checked it. it feels dry to the touch. feels crumbly. i can take a small pinch between my fingers and it works together pretty good. takes a minute to soften up but it worked. it still had water in it though. i would assume it will take a day or 2 to fully dry.
To properly process and dry your water-hash it starts with the plant material. You want the resin to be finished at the peak time on the plant. Then the resin needs to cure and dry after harvested while still on the plant. Usually about 2 weeks to a month is a good drying time for your plant material. This gives the resin time to dry and cure while still on the plant. Before being separated. When separating wet resin from wet plant material you final resin will always feel wet. If your plant material is to dry then you will get a lot of contamination from the plant material breaking down. Also remember any plant material not covered with resin will break down fast. So try and avoid any plant matter without resin on it. It will just take up weight and space and cuase your final hash to be less quality.
While processing your water hash, be careful to never squeeze the hash while it is wet. When pulling your bags, always rinse the wet resin to the middle of the bag with fresh clean water (RO preferred) let them drain until you have a drip of water. Then place the bag with the resin in the middle of the screen on top of a kitchen shami or stack or paper towels. This will absorb the water from your resin. Pick the bag up and place on a dry surface until you have aborb all the loose water. Then harvest the resin with a plastic card and place on a drying screen.
Now you can take another couple of pieces of paper towel and fold them and push up from underneath the screen to absorb anymore loose water. Now you can take the card and start to break up the resin. It will not break up easily at first. You need to keep absorbing the water and break it up into powder over the first 3 to 4 hours. If you wait to long it will be to hard to break up.
Let it dry for 7 days before pressing it to take to the clubs or storing it. The freezer works good for storage.
After pressing yourself a patty of hash, the hash should snap apart makng a noise, not tear apart. This is how you can tell if it is dried properly.
Aqua Lab Tech
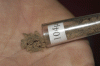
it's looking really good. i have it sifted out to where it looks like heavy sand. it is drying nicely. i worked a small ball together last night. it is now nice and hard (the samll ball). i dug in my thumbnail and try to "pull" a piece off, it "snapped". i then flattened the piece that broke off and placed it in my pipe. IT BUBBLES!!like i said from the beginning.....you guys rock. come to sonoma county and my door is open for you. anytime.
i have a heating pad i use for my clones. i placed it on my table with a towel over it then a big piece of clean tempered glass over that. i am attempting to create a "hot table" that i can use to work my hash on. i prefer to hand form it as opposed to pressing it with tools. i will keep everyone updated on this technique.


i had a HUGE post all type out. i loaded a bunch of pics. closed the wrong window and it all went away.
i heated a big light bulb and pressed it on top of a pile of dry crumbs on glass with a heating pad and towel under it. it worked great. the bulb was cool enough to keep on my forearm, my wife called it "baby bottle warm". then i held my hands over my heater as i worked it all together. it turned out beautiful. it "snaps when i bend it. it is brittle yet pliable. it rattles against the glass but bends if you go very slow or rub it. i will continue to do this in the future. thank you once again aqua labs, you changed my methods for the better.
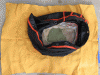
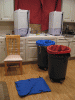
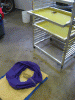
View attachment 87368 View attachment 87369 View attachment 87370 View attachment 87371 View attachment 87372 View attachment 87373 View attachment 87374 View attachment 87375
Nice work FDD2, Looks like you have some really nice quality there.
Aqua Lab Tech
Nice work FDD2, Looks like you have some really nice quality there.
Aqua Lab Tech