Positivity
Well-Known Member
Lets build a 200w light
Sometimes people can get lost in the crazy world of leds. This will be a meager attempt to help those truly interested in building their own high performance grow light
The first build will be a standard 200w light. It can easily cover a 2' x 4' area. I'll do my best to absolutely minimize the tools and steps needed. I'll also try and provide further steps in case you do have a few tools around
The second build will be a cased 200w design. Cases are my preferred way but they do require a bit more work. But, even that can be made very easily.
This will be a slow work in progress as i find the time. I'll try and get it done within a week or two depending on how much time i am able to devote
Anyone else putting together a light I would encourage you to share the process as nothing helps more than a instructional with pictures. I learned myself through various diy sites and will just be further sharing.
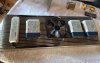
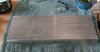
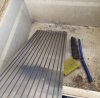
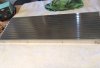
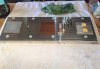
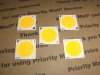
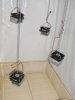
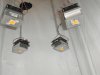
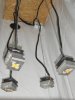
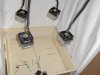
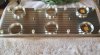
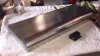
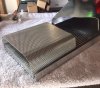
So, to start, I will be reusing a old t-slot heatsink from heatsink usa. Originally made for leds on a 20mm star pcb it will be modified to work with cobs.
If you are purchasing a new heatsink you can ignore the first few steps. For those with a t-slot heatsink I'll be sharing a way to keep the heatsink useful.

Updates to follow shortly..
Sometimes people can get lost in the crazy world of leds. This will be a meager attempt to help those truly interested in building their own high performance grow light
The first build will be a standard 200w light. It can easily cover a 2' x 4' area. I'll do my best to absolutely minimize the tools and steps needed. I'll also try and provide further steps in case you do have a few tools around
The second build will be a cased 200w design. Cases are my preferred way but they do require a bit more work. But, even that can be made very easily.
This will be a slow work in progress as i find the time. I'll try and get it done within a week or two depending on how much time i am able to devote
Anyone else putting together a light I would encourage you to share the process as nothing helps more than a instructional with pictures. I learned myself through various diy sites and will just be further sharing.
So, to start, I will be reusing a old t-slot heatsink from heatsink usa. Originally made for leds on a 20mm star pcb it will be modified to work with cobs.
If you are purchasing a new heatsink you can ignore the first few steps. For those with a t-slot heatsink I'll be sharing a way to keep the heatsink useful.
Updates to follow shortly..


 ...
...