Al Yamoni
Well-Known Member
Well I've had 3 G1 BS240s and everyone of them died, or more correctly had the diodes crap out shortly after my warranty was expired. $135 for a new board is a good idea since once 1 diode blows, the writing is on the wall and the rest are sure to follow but for $135.00 you could build a COB based light or turn it into an Illumitex based panel like I did my old Blackstars.
Having said that it is possible to remove all the screws, find the blown diode, replace it or jump it with a wire, (careful with that solder cause you don't have a lot of room here and it's easy to short it to the heatsink), re-apply thermal paste to every diode, (G1 Blackstars don't use thermal pads but one could use a thermal sheet to avoid this tedious step), then ever so carefully screw all those effing screws back in with out shorting it to the heatsink. Then wait x weeks for another LED to die and repeat the previous steps. For the most part G1 Blackstars don't last too long unless they're used in a perfect environment. Even then they will lose quite a bit of output over time since the LEDs are driven pretty hard, are not high quality and cooling is really an afterthought on them.
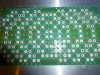
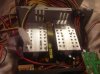
From the pictures your repair job might be a bit easier but I can't be 100% sure because I need some better pix of the diodes and heatsink. Get a multimeter. Set it to read DC and start probing. Find the bad diodes(s) and either replace, jump it with a wire or perhaps add a Zener. Or like mentioned before by P build a COB based light with what you have, though again I need to see better pictures to see what you have to work with.
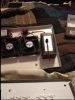
So I've got it all apart and I even removed those couple hundred screws that you mentioned (EF THAT).
I do not want to fix it because it is a highly unimpressive hunk of crap.
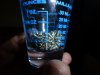
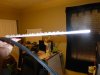
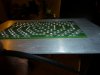
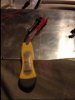
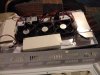
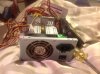
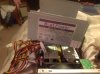
I did get them to send me a full spectrum board for free though (after tons of complaining about the heatsink and how shitty they are to their customers) I want to make some DIY lights out of this junk. here are some pics.
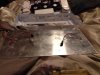
Can I do anything with this "heatsink" to make it function as directed, Maybe drill holes in it around the edges and push air though them via fans?
I really want to make some COBs but I want some practice first!