meangreengrowinmachine
Well-Known Member
I top dressed the flowering ladies with some of the soil I have cooking mixed with ewc and some bat guano (i know big no no I bought it on a whim long ago and won't again) then covered them with some malted barley mixed with mollases and em1 water to keep the tops more moist. Hopefully this will clear up whatever is going on with the middle 2. I will give them more phed water ... and cheat and add some cal mag, to the rez's tomorrow.
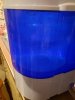
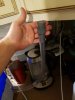
Also nodded my bubble machine to have a bigger hose and tested it for leaks. Cut my bags to frenchie specs and have my trim all freezing, micro plane and brand new pizza boxes ready. I think I am finally ready to get it done!
Also nodded my bubble machine to have a bigger hose and tested it for leaks. Cut my bags to frenchie specs and have my trim all freezing, micro plane and brand new pizza boxes ready. I think I am finally ready to get it done!