Blueberry, DWC, Full Grow, DIY Nutes, Vertical Scrogg, 100w mh, 150 hps

smoote1987

Well-Known Member
Specifications of grow:

Strain: Blueberry (i was told that it was an outdoor variety, i know nothing more)
Growing Medium: DWC Hydroponics
Nutrients: DIY nutirents, made from raw chemicals, changed every two weeks, following a found recipe however adjusting recipe as needed from observations of the plant, ppm is tracked on paper and measured from doing the math for the initial concentration. Using regular tap water ph adjusted from 6.8 to 5.8
Lighting: 150w hps running 12/12, 100w mh running 24/0, cool tubed
Grow Room Conditions: Veg chamber, temp(78*f) humidity (60%); Flower chamber, temp(79-80*f) humidity (35%)
Growing Method: Vertical Scrog, Build pics in intial posts.

*all specifications subject to change as needed*

OK so thats what this grows about. This is my first journal and I'm very excited. I hope that I learn a lot with the help of RIU.

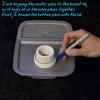
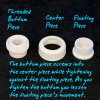
There are a few things that I am trying differently than most. First is the vertical scrog method, second is the DIY nutes, third... i really hate typing so i will be trying a work around by just writing all of my notes and the post's copy on the actual pictures themselves. Please anyone let me know if this method of conveying information, notes on the pictures, does not work for you, is too confusing, or you cannot read the type and i will gladly type out the post instead. All pictures should be viewed in order to make the most sense, the order goes from the top most left picture of the set across to the right down to the bottom most right picture of the set.

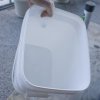
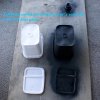
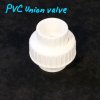
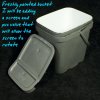
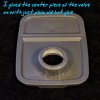
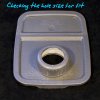
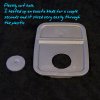
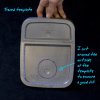
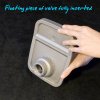
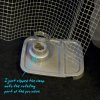
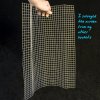
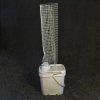
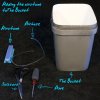
Well here goes, These four pictures are of the new buckets, stock fresh from the manufacture.

Please no one post until you see this: 8-) done, ready for comments
 

Attachments

smoote1987

Well-Known Member
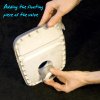
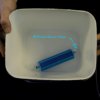
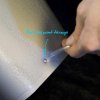
First set of build pics: 10 pictures, these pictures are of an explanation of how the pvc valve works, tracing and cutting the hole for the valve, and adhering the valve to the bucket lid.
 

Attachments

smoote1987

Well-Known Member
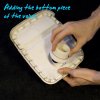
second set of build pics: These pictures are of finishing the addition of the PVC valve, adding a clamp to the salvaged screen from my last buckets, fixing the screen and clamp combo to the floating piece of the PVC valve, and the last four are of the vertical scrog rotating on top of the bucket.
 

Attachments

smoote1987

Well-Known Member
third set of pictures: 8 pictures, these pictures are of adding the air stone to the the buckets
 

Attachments

smoote1987

Well-Known Member
Last set of the initial pictures: 4 pictures, The first two are of the blueberry clone from a week ago when the first real signs of new growth emerged. The second two pictures are of the clone today after a week of growth. They are also pictures of the clone in the new buckets, and the buckets in the grow room, as you can see they are a much better fit than my previous round buckets.
 

Attachments

grassified

Well-Known Member
cool setup. Was that clone of an already flowering plant that you revegged? If so, how long did you put the photoperiod for it to reveg?
 

smoote1987

Well-Known Member
cool setup. Was that clone of an already flowering plant that you revegged? If so, how long did you put the photoperiod for it to reveg?
Thanks, grassified.

Yes is was taken from a flowering plant and revegged, The roots took about three weeks to take under 24/0. After that you can see from the post above yours what the growth has been like since it was placed in the dwc bucket from my aero cloner.

plus rep for being the first to post on my journal
 

Hulk Nugs

Well-Known Member
Looking good man, first time i saw a vertical scrog crazy, How does your room/ area your growing in look ?? I was checking it out last time but you dont show much of it on this thread. Oh yea man i have been trying to find your thread so i would put a link to it in your Sig. So everytime you post you have your thread link on the bottom. going to be fun watching this one.

and if you want throw up the co2 thing you were talking about ... i have been using your other formula that you hooked us up with on jigs page. I have two rooms my flower is bigger then my veg but the actualy area that i am growing in is the same 2x2x6
 

smoote1987

Well-Known Member
Looking good man, first time i saw a vertical scrog crazy, How does your room/ area your growing in look ?? I was checking it out last time but you dont show much of it on this thread. Oh yea man i have been trying to find your thread so i would put a link to it in your Sig. So everytime you post you have your thread link on the bottom. going to be fun watching this one.

and if you want throw up the co2 thing you were talking about ... i have been using your other formula that you hooked us up with on jigs page. I have two rooms my flower is bigger then my veg but the actualy area that i am growing in is the same 2x2x6
Thanks for the points hulk, will make the changes as soon as possible.

things to be added soon:

• Pictures of entire room Done
• Link in signature Done
• Pics of my small mechanical co2 set-up Done
• Chart for calculating the ppm of a solution, and the npk % compared and values needed to maintain those % and reach a certain ppm Done
• Complete nutrient schedule that i am planning to follow but doubt that i will, being as i will be adjusting the nutrient solution on the fly to attribute for nutrient deficiencies from observations.

Edit1:

Links to my PPM calculator that I made. It has a field for micro but i haven't set that up in the file yet because i just don't feel like doing the math just yet. They're both the same file though one is a numbers file for macs, and the other is for windows with excel. The file functions better in numbers, sorry Microsoft users.

To download you need to click on the link, Then click on download for free with the basic version, then fill in the code exactly as is, then click on the free download link. So stupid but its free and relatively fast and easy to use. Hope this is useful to someone.

Numbers File:
Download PPM Calculator.numbers from FileFactory.com
Excel File:
Download PPM Calculator.xls from FileFactory.com

The Paintball tank was bought on ebay for around $15 shipped, the bubble counter is DIY as you can see so it was free, and the regulator/needle valve combo can be found at the following link for $34.99.

http://www.thatpetplace.com/pet/prod/239899/product.web

keep in mind that the regulator is cheap so not all the parts are perfect and of the three of these that i own i only had one leak. All i did was to take the valve apart with a crescent wrench and wrap all the threaded pieces with plumbers tape and that stopped all the leaking.

My co2 tank usually lasted about 3-6 weeks depending on the bps i had it set at. When i had it set around 2-3 bubbles per second it lasted closer to 3 weeks. I think this small set up would be perfect with a good solenoid valve hooked up to a co2 meter for most small grows.
 

Attachments

smoote1987

Well-Known Member
Thanks for the points hulk, will make the changes as soon as possible.

things to be added soon:

• Complete nutrient schedule that i am planning to follow but doubt that i will, being as i will be adjusting the nutrient solution on the fly to attribute for nutrient deficiencies from observations.
I've been thinking about this one for a while but am not quite sure what sort of schedule that i would like to follow.

Does anyone have any recommendations of a nutrient PPM schedule through veg and flower, or maybe a link to a general PPM schedule for all hydroponics systems?
 

jigfresh

Well-Known Member
I've been thinking about this one for a while but am not quite sure what sort of schedule that i would like to follow.

Does anyone have any recommendations of a nutrient PPM schedule through veg and flower, or maybe a link to a general PPM schedule for all hydroponics systems?
I love your journal... I am very happy with my own grow setup, but I am extremely jealous of you nice clean journal. Damn good work so far.

My nutrient co has a schedule with the target ppm's listed by week. It is adjustable for veg/ flower length, and they have a couple different mixtures you can test to see different target ppm's for various nute systems (from one brand of course), but it is a good idea.

http://www.dutchmaster.com.au/?language=english&page=nutrient_calculator

Play with the 'Nutrient/ Light Cycle" pull down box to see the different target ppms. Hope that helps a little.

What is in the yellow bin? Is that the reservoir for the aerocloner?
 

Hulk Nugs

Well-Known Member
Looking clean man nice setup, what is the messurments of your room ? Did a really good job for fitting everything in that small of area. Have your grown in here before ?? or is this your first grow? Sounds like you know allot about co2 but i know your reall sick with growing plants in your aquriums.

As for the Nutes i think its all depends on what kind of nutes you are going to be using. I even didnt like my chart from what i was reading every one had a high ppm and on my chart it said never to go past 800 ppm so after reading and watching other grows i just said fuck the chart and went on my own added 100 ppms every nute change sometimes more. I think if i stayed with the chart my nugs wouldnt look the way they do. Just caught my self rambaling on Dam just got some Blue Dream reallly nice nugs and dam the high is making me put this strain down in my blackbook. bongsmilie
 

smoote1987

Well-Known Member
I love your journal... I am very happy with my own grow setup, but I am extremely jealous of you nice clean journal. Damn good work so far.

My nutrient co has a schedule with the target ppm's listed by week. It is adjustable for veg/ flower length, and they have a couple different mixtures you can test to see different target ppm's for various nute systems (from one brand of course), but it is a good idea.

http://www.dutchmaster.com.au/?language=english&page=nutrient_calculator

Play with the 'Nutrient/ Light Cycle" pull down box to see the different target ppms. Hope that helps a little.

What is in the yellow bin? Is that the reservoir for the aerocloner?
Man your journals great mines only two pages long. I told you that the build pics were going to be enticing though :wink:.

Thanks for the link jig, i can get a rough estimate of how those nutrients compare to mine from the specs.

I think you're talking about the ultrasonic fogger. I plumbed it into the cloning unit. Its a combination of an air stone and the fog.
 

smoote1987

Well-Known Member
Looking clean man nice setup, what is the messurments of your room ? Did a really good job for fitting everything in that small of area. Have your grown in here before ?? or is this your first grow? Sounds like you know allot about co2 but i know your reall sick with growing plants in your aquriums.

As for the Nutes i think its all depends on what kind of nutes you are going to be using. I even didnt like my chart from what i was reading every one had a high ppm and on my chart it said never to go past 800 ppm so after reading and watching other grows i just said fuck the chart and went on my own added 100 ppms every nute change sometimes more. I think if i stayed with the chart my nugs wouldnt look the way they do. Just caught my self rambaling on Dam just got some Blue Dream reallly nice nugs and dam the high is making me put this strain down in my blackbook. bongsmilie
Thanks for the compliments hulk.

Measurements are 2'W x 1.5'D x 3"H, There are two chambers with the same dimensions. One for flower and one for veg.

I guess this would be my 3rd grow in here. I've been on a cycle that puts a new plant in there each month. So i guess it's my third. It's making me learn things real quick.

Yea i was thinking about just slowly pushing the nutrient PPM up until i hit around 1500-2000 and watch for signs of stress. Then back down slowly and flush. i was looking for a reference of where to start and you guys gave me that, thanks.

Here's a couple pics of the grow room from another thread i started
 

Attachments

Ray Fox

Well-Known Member
You know Smoote, when we first checked out vertical scrogs we thought they kinda looked retarded... But after keeping up with yours we've been recommending them to friends as the way to go. Even considered changing our scrog to a one with a net on all sides of the plant (a BOG then? Box of green?) This looks awesome dude!:joint:
 

smoote1987

Well-Known Member
You know Smoote, when we first checked out vertical scrogs we thought they kinda looked retarded... But after keeping up with yours we've been recommending them to friends as the way to go. Even considered changing our scrog to a one with a net on all sides of the plant (a BOG then? Box of green?) This looks awesome dude!:joint:
Thanks for the compliments Ray. Thanks for the spreading the good word thats really nice i'll try to keep the good karma train going.

Yea i think the term is a bog or tog, box of green or tube of green respectively. I'm glad i've changed your mind about them. I think one of the misconceptions about scroging in general is that they HAVE to be horizontal. Where as they can be placed however you want, it's all about getting equal light distribution across the entire plant and the screen should be placed in a way that helps you do that be it vertical, horizontal or any other placement you can come up with. I mean mine curves around my light as well to keep the intensity the same on all parts of the plant, consequently I'm getting really even growth across my whole plant.

Hope to see you here often.
 

smoote1987

Well-Known Member
Updates to the specifications of the grow journal

Specifications of grow:

Strain: Blueberry (i was told that it was an outdoor variety, i know nothing more)
Growing Medium: DWC Hydroponics
Nutrients: DIY nutirents, made from raw chemicals, changed every two weeks, following a found recipe however adjusting recipe as needed from observations of the plant, ppm is tracked on paper and measured from doing the math for the initial concentration. Using regular tap water ph adjusted from 6.8 to 5.8
Lighting: 150w hps running 12/12, 100w mh running 24/0, cool tubed
Grow Room Conditions: Veg chamber, temp(78*f) humidity (60%); Flower chamber, temp(79-80*f) humidity (35%)
Growing Method: Vertical Scrog, Build pics in intial posts.
Updates: Updates to grow journal will come every Thursday and Sunday of each week.

*all specifications subject to change as needed*
 

smoote1987

Well-Known Member
Hey guys sorry for the late update, it's been a long day. Helping a friend move in, enough said.

Well here's the update pictures they're following the same notes on pictures format. Again if this isn't working for anyone let me know. If it is good for everyone more notes and pics like this will follow. I will continue to give a short synopsis of what the pics are about in the post just incase. However that will most likely stop and the pictures with writing will be all i post if that works for everyone? I really really hate typing and i feel this is a much more satisfying way to view a journal. I mean the pictures are the best part right :mrgreen:?!?

Oh p.s. got the post title formatting from Jigfresh's journal. I really like the way you catalogued each update. Very clean and concise. Good work. Though i added a little more detail. I'm a bit OCD i hope you all don't mind.

Formatting:
Update: {Day # of Journal}{(growth cycle: VEG, FLW) [(days in growth cycle) : (light cycle) ]}{GROW [(total days of grow) ]}{NUTE [(nutrient ppm) : (N-P-K ratio) ]}


Pictures:

1. The first pic is of the whole room and plant
2. The second is to give an actual sense of measurement (i don't know why the camera has that red blur)
3. Better detail shot circled all the new shoots or terminal buds
4. This one is of the coloring of the plant. i love the look of this plant its so beautiful when it hits flower I'm so excited.

oh and it's ridiculous how much the new clone has destroyed the flowering cutting when it revegged.

Also I think I might start writing the notes in red instead of the blue. Any one second this?
 
Top