Roseman's DIY Bubbleponics Tutorial

Roseman

Elite Rolling Society
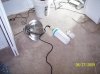
It takes me 4 hours to do what ought to take ten mintues, because of the picture taking, RESEARCH, PROOF, UPLOADING PICS, and trying to be so accurate and then documenting and adding the text to this thread. But the water is in the tanks and bucket, and the pumps are running,
and yesterday is DAY ONE! 97 more days to go CHOP CHOP!!
 

Roseman

Elite Rolling Society
Many topics in Hydroponics are arguable, often debated. Even Ed Rosenthal and Jorge Cervantes disagree on many subjects, LIGHT and WATER being the main two.

Jorge Cervantes says to start with PURE water, R.O. Water, (Reversed Osmosis) or Distilled water, or Filtered Water. Ed Rosenthal says CITY water works just fine, as well as Well Water.

One of the not so simple procedures for many growers is maintaining a level pH. And if the plants are eating and drinking daily, the pH will change daily as they eat and drink, removing nutrients from the water.

I will not get into a bunch of scientific points to make here, I will only report on personal experience. I do accept and believe the more controversial side of the coin, that City Water and Well Water not only works or performs just fine, but works best for me.

If you will google "Water, pH, Buffers" and research it, you will find both sides of the coin. You will learn that water with content, (water with Lime, Calcium, Iron, Maganese, Magnisium, and other minerals) is easier to maintain a level pH, than Filtered Water, R.O. Water, or Distilled Water. ( a buffer is a stabilizer)
Those minerals act as "buffers" holding or maintaining the pH at one level.
Water that has no content will drift up or down in pH more quickly and need additonal added buffers.

Then there is the dreaded "clorine" in the city water.

I once took a job selling Water Filters. I had to go to a short class for two days, studying city water, water filters, and clorine. We would go to a prospect's house, with a clorine swimming pool test kit. We would test thier water and frighten them, and show them it was too highly clorinated to swim in, much less drink it. We'd hook up the filter, let them use it for free for a week, drinking their tea and coffee with no clorine in it. When I came back a week later, they would not want to give up their filter. They would buy it everytime.
We were taught and had it proven to us, that clorine will "disapate" ( a fancy word for vaporize, or disappear in vapors) with any added heat, aeration, or being allowed to sit an hour.

In the past two years, I did two very successful grows at my X-wife's house, and she has city water. We tested it with a swimming pool clorine test kit. It was very high in clorine. I ran the water from a faucet, over the warm palm of my hand, into a large metal bowl. When the bowl filled, I poured it into a five gallon bucket, one bowl at a time, holding the bowl up high, allowing the water to fall through the air. When the bucket was full, we stirred it, tested it, and 75% to 80% of the clorine was gone, no smell, no odor, no taste.


Today most citie use chlorinated water. Many cities have switched to a form called Chloramine. This form will not dissipate, will not evaporate, will stay in the water forever.

You can check if your city uses Chlormine on your water supply's website. All info must be reported on Chloramine levels.

You can find Dechlorinators at your local aquarium stores. Most often it is sold to people with large fresh water home made ponds. Generally they run city water, but do not want the chlorine or chlormine to hurt there VERY pricey Coy or other fish. Dechlorinators work great, and are easy to use. Many growers still report great growing results with city water.

Three years ago, I tried to do a grow with store bought distilled water at a friend's house. His water had a sulphur smell to it. I read it was best to use filtered water, in a Jorge Cervantes book. Cost us 79 cents a gallon then. I only did one 6 gallon tank of water, and after we bought and hauled water for 4 weeks, spent about $30 to $40, and battled and battled pH spikes and pH flucuations for a month, I wised up. It is very difficult to maintain a level pH in Filtered or Distilled Water.


And there is water with energy or electolytes and there is dead water. I want my water full of energy, not dead from filtration. So I use and prefer well water.

And two years ago, I wised up about hauling 6, 12 and 15 gallons of water from the kitchen to the spare bedroom closet when I start a new grow.


Check this out.


A 25 foot indoor hose for watering house plants.


So I filled each tank and my bucket. I need 6 gallons of water in each tank, and I filled them up to within a half gallon of what I needed. I just guessed at the Buckt's water amount. You have to have a one to two inch air pocket under each grow cup.


Do not over fill that bucket, it will run out the holes on the sides.
 

Roseman

Elite Rolling Society
Peeking inside, I see my black magic marker line that indicates the 6 gallon level. I will not completely fill the tank to that level until I add my nutrients.
And after plugging up the water pumps, I check to see if water is dripping from each cup.


Now I unplug the water pump to adjust the pH.


I do not have any available pH TEST STRIPS to demonstate to you. But as you watch this GROW, you will see I do not try to be precise or dead on the money. When I want 5.9 as perfect, I will gladly accept anything between 5.5 and 6.5.

I have done 4 GROWS with TEST STRIPS, and they work just fine.


Now, I must test for, adjust and set the pH of each reservoir. This is the only time I can adjust it IN the tank. NEVER adjust the water's pH in the tank, with plants growing in the tank.

My well water is normally 7.0 to 7.2, but after running through that rubber hose, it is lower, 6.98.


Why running water through a hose changes the pH level, I do not know. I just know it does. I don't undertand how the microwave works either, but I still use it to pop popcorn.


I go get my gallon jug, and add 1/2 gallon of water. I want my tank's water at close to 5.8, 5.9, or 6.1 would tickle me.
My water is at about 7.0, actually 6.98.
I want it close to 6.0. 5.9 is perfect.
My pH Down additive says add .2 gram to lower one gallon .1 pH .
I figure 1/3 fluffy teaspoon for one gallon, or 2 fluffy teaspoons for 6 gallons. I can always use some pH UP if I go too far. Again, it is OK and safe to adjust it NOW in the tank, but never again, never with sprouts or plants in the water.


My little yellow measurer holds 2 teaspoons total, packed down in the spoon.
Attached Thumbnails
 

Roseman

Elite Rolling Society
I hook up my air pumps, to stir up the water. I hang my air pump up high, so if the electricity goes out, the pump will not draw up the water. I also want my pump in a "out of the way" place, so it does not get heated by the lights and pump hot air into my tank.


Those two airstones kick butt!

Attached Thumbnails
 

Roseman

Elite Rolling Society
The moment of truth!


6.06 !
Close enough, I'll take that. (Sometimes I surprise myself)
If I tried to add a pinch of pH Down, it would go too far, no matter how little I added. I am not chasing the pH, I am not riding the pH Roller Coaster.
Attached Thumbnails
 

Roseman

Elite Rolling Society
Now I hook up the air filter for the bucket. It is a much smaller air pump, but ample enough!


That air pump and stones are working fine.


5.72 is close enough for me!


Attached Thumbnails
 

Roseman

Elite Rolling Society
I am getting there, time to rinse that hydroton rock. You can rinse it ten times and it will still need rinsing some more.


I have done this many times, and the very best way is to put it in a bowl, fill it full of water, and then pour it though a collander, ten times, no 20 times.


Amazing thing about Hydroton is how it transfers water. Place a wet rock next to a dry rock, and the dry rock will immediatley absorb the water like a sponge. I don't think Hydroton rock needs explaining. It is just what is best in hydroponics to hold air and water and nutes and support the plant.

AFTER you rinse it and after you are sure you got all the dust rinsed off, then soak the hydroton in pH balanced water before adding it to your cups.
Attached Thumbnails
 

Roseman

Elite Rolling Society
AFTER you rinse the hydroton ten times and after you are sure you got all the dust rinsed off, then soak the hydroton in pH balanced water before adding it to your cups.


Time to load the cups.


That is my little helper, ANGEL, my white-butterscotch ferret.

In each cup, I put the rocks one inch deep. Then I sit the cube in the center of the cup, and butt the tube into the cube.


I have tried placing the cube at the top of the cup, the center of the cup, and at the bottom of the cup. The lower the cube, the sooner the roots hit the deep water. In the end, at Harvest Time, you can not tell any difference in growth rate. I try to put the cube in the center, closer to the bottom than the top of the cup. The roots hit the deep water sooner, and the base of the plant gets more support from the rocks.

Attached Thumbnails
 

Roseman

Elite Rolling Society
After I load each cup with a rockwool cube and hydroton rocks, it is time to plug up everything, both the air pump and water pump, and check that everything is working properly.

I am using Northern Light Seeds in the two reservoir tanks. I am using some seed given to me called SKUNK in the bucket.
Let me highly advise you to grow INDICA and NOT SATIVA, especially your first few attempts at growing. August 24th is DAY ONE for me, and I anticipate another 90 days to go til harvest.

I now take my seed that soaked for 28 to 30 hours hours, ( I only wanted to soak them 24 hours) and with clean hands and clean tweezers, I place a soaked seed in the middle of each cube. The higher the seed, the faster I see a sprout. The lower the seed, the faster it hits the deep water. One of the seeds has alrady cracked open, exposing white inside.


And that completes the assembly and germination process for me at 8:24 p.m. August 24th, 2009. I will re-arange and neaten up the wires later.
Attached Thumbnails
 

Roseman

Elite Rolling Society
I know I will get at least one dud, a seed that does not sprout. I also expect a runt or two runts.
I am going to germinate 5 extra seeds, using the "wet paper towel" method. Some growers perfer to sprout the seeds first in a wet paper towel, then after they are sprouted, add the sprouts to the cubes. I will use these if I have to replace a dud or runt.

I simply take a doubled up wet paper towel, folded in 4ths, soaking wet, and lay my seed on it.


I cover it with a 2nd doubled up paper towel, and then cover that with a bowl.


I sit the bowl and plate in a warm dark place where the air conditioner will not blow cold air on it.


I can soak a seed 24 hours and get it to sprout in 30 hours, but IF I soak 12 seeds at a time, I will average 4 seeds that take a full week to pop open. There is always one to three that pop very fast, and some that take a week. Be patient. You can not be a successful grower, if YOu can not develope PATIENCE.
 

Roseman

Elite Rolling Society
I started soaking the seeds Sunday afternoon, 8-23-09 around 4:00 pm.
I wanted to soak them 24 hours, but I soaked them about 28 to 30 hours.
I placed them in the cubes around 8:15 to 8:30, Monday night, 8-24-09.
Tuesday night, 8-25-09 around 9:00 pm, I found this sprout already.
I went in to the closet to make sure each and every cube was soaking wet. That lets me know my water pump, tubes and hub are working good. What a surprise!
Try this same experiment in a plain DWC, or Aeroponic System, or whatever, and see how that sprout does.

This is what the feeder tubes and irrigation hub and bubbles are all about, SPEED!
A VERY RAPID Start. A Very Rapid GROW!

Bubble Heads Rule!


Roseman

Elite Rolling Society
I have a few sprouts, but not all of them have sprouted yet.

In that first pic, that is a root coming UP, upside down. This is my 8th grow and I have never seen that happen. It took me two days to figure out it was a root, I
thought it was sprout with the leaf missing. After two days, I took it out of the cube and saw it was upside down, so I turned it over and soaked it good and put it back in the cube, root tale downward.


Roseman

Elite Rolling Society
I have to get some Lights up.
When sprouts come up outdoors, in nature, they come up looking for sunshine, for LIGHT.

I hung a 200 watt bulb over my first tank, 6500 Kevin, in a Parabolic Reflector. I'll get the DUAL SPECTRUM going soon with a 2nd bulb. I just wanted to try it. I will not use it for the entire grow.
My 2nd 200 watt bulb would not work properly, it flickered and only half of it lite up. I strongly dislike Tube type CFLS, but I do love the spiral ones. I have had many bad experiences with the tube types nor working. You have to plug them up and wait for them to get hot, and sometimes they just fail to light up.
I was surprised that I can touch it and hold it a few seconds and not get burnt. But it does put out a lot more heat than the 42s, 65s, and 85 watt bulbs.

Here I hung a 85 watt 6500K and a 85 watt 2700K bulb over my bucket.
(K means Kevin or color temperature of the bulb, I will explain later)


The 2nd 200 watt tube-type CFL bulb worked for one night, the first night, then half of it quit working. This pic is the first night I had sprouts.


Attachments

Roseman

Elite Rolling Society
I am examining every grow cup now, to see what has a sprout and what does not. I found two duds and replaced them with seeds from my germination plate. I found 5 that had not sprouted above the surface, but they were almost about to pop up. I checked my tubes and found one feeder tube disconnected and the cube was slightly dry, or more dry than it should have been.
 

Attachments

Roseman

Elite Rolling Society
Over this tank I have a 105 watt SPIRAL 2700 K bulb, and a tube type 105 watt 6500 k bulb. A high wattage dual spectrum. I will explain that DUAL SPECTRUM later.


Same tank:


I do not want the light hitting the rocks, or tubes and I will correct that later.
 

Roseman

Elite Rolling Society
I try to run the power cord up the chain, and attach them together with cheap masking tape. I run
the chain around the clothes bar in the closet.


Attachments

Top